
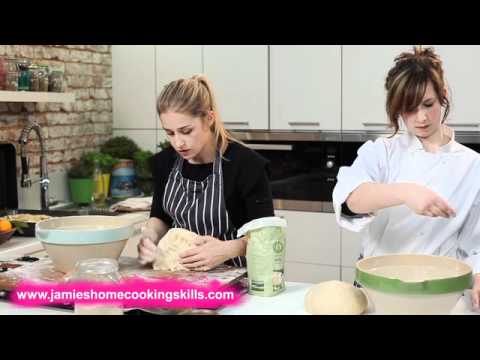
so we’re making bread a basic bread
dough and the way in which we’re going
to cook it in a big tin so it’s nice and
flat we’re going to push loads of
flavors into it we’re going to make it
into a focaccia so first things first
because it’s baking it’s more like a
science you have to be really accurate
with it because they’re not like a
recipe where you can add a bit more of
this and a bit more of this you’ve got
to be absolutely spot-on or it’s not
going to work as we wanted to so the
first thing is it’s all about measuring
so flour the main ingredient we want a
kilogram of this one kilo and then just
keep your bag to one side because we’re
going to be dipping a little to that
flower to helpers so these can come out
of the way because we’ve finished
waiting now and then we’re going to make
our dough on the surface so make sure
you’ve got a really nice clean surface
because it’ll pick up any bits of stuff
that’s on your counter you don’t want
that in your bread and then we’re going
to make a big pile of flour try and get
it awesome high they can go so in the
middle of this make a well so put your
hand in and just push the flour to the
sides and then you make like a volcano
like a hole in the middle and this is
what’s going to hold all of our other
ingredients
so then we’ve got our water here we’ve
already measured it out and we’ve got
625 milliliters which is just over a
pint that’s the right quantity and it
needs to be the right temperature and
that’s because we’re using yeast and
yeast is a living ingredient so when we
put water with it it’s going to come
back to life and start acting and start
creating oxygen and air and bubbles and
that’s what makes your bread rise okay
so so that we don’t kill it off your
water can’t be too hot and because we
don’t want to send it to sleep it can’t
be too cold so it’s got to be lukewarm
or sort of like room temperature and the
way that I tell is if you’ve got your
water if you can put your finger in and
you can’t tell the difference in
temperature ie doesn’t feel cold or it
doesn’t feel warm then it’s the same
temperature as your hand which means
it’s perfect temperature fees yep that
one yeah
well good okay so half of this can go
into your well it doesn’t have to be
absolutely exact until it looks sorta
four and then into that yeast and it’s
three sachets in there seven grams each
so to that mixture we’re going to add
two tablespoons of sugar what that in
it’s going to add just a bit of
sweetness to your bread but I like to
think that it gets your yeast all
excited and on a sugar high so it makes
your bread a bit better and then one
tablespoon of sea salt okay and then we
start mixing it in to mix your
ingredients in the middle and then
around the edge of you well keep
catching the flour and getting that to
join as a party as well and then bit by
bit they’ll all start mixing together
and you want to do that till it’s like
them like pouring sugar mix it quickly
and then it will thicken up the web
burst through the banks so that’s like
porridge and gloopy horrible porridge
but still not apology so then I can I’m
ready to add a bit more my Ward’s now
and if you sighs going to get a bit low
like this and it looks like it’s going
to burst just push them off a bit for
pictured it’s a flower from somewhere
else and build up water you see these
bubbles yeah this is you starting to
work its waking up I’ve misplaced my way
now so now I’m just wish Monsieur note
ingredients get a wedge because that
will change the glasses see the bread
just cooking it all up and mixing it all
together okay so it’s starting to come
together a bit low so make sure you keep
flouring your balls not too much because
you don’t want to add too much flour tea
mixture because it’ll dry it out also
you don’t want it to stick and keep to
the flowering it needs to and then if
you that’s it if you push it out so it’s
long that’s it and then you turn it this
way if you grab it from the back and
push it into itself take grab pull push
grab pull push you end up with another
long one that you push that flip it
round do it again
and this is kneading now this gets the
flour doing what it should be doing so
it gets it all nice and elastic tempted
and works the gluten in the flour which
is what gives your bread its texture and
the more you knead it and the rougher
you are the best of the bread and if it
soaks up all you flower like this and
you keep adding little sprinkles so can
you see that already it looks a lot
smoother and it feels different doesn’t
mean it feels a bit spring gear a bit
more elasticated and actually does get a
bit puffier because by folding that over
there we’re trapping air into it and you
should do this about five minutes
trust me this your cocoon so look you
see how the skin of yours is still quite
dimpled yeah where we keep kneading
that’s going to go you really can be as
rough as you want persuading it that it
wants to be a ball
yeah lovely so Pat it into a round
we’ve got no big air holes on the
surface it’s quite nice and smooth and
you’ve been needing it for about five
minutes so that it gets springing it so
if you push your thumb in and it’s your
bounce-back boom so that goes into a
bowl and you want to put flour in your
balls it doesn’t stick so the same way
that you put it on the surface of your
that you need it on just sprinkle some
in and then just run these under the tap
and rinse them out hit at the damp this
will keep the moisture level in the
bottle nice and high so that you don’t
dry out whites proving improving means
that it’s just the yeast growing and
it’s growing in size and we want it to
double so hopefully it’ll be just about
touching that by the time I wanted
that’s going to be about an hour so
that’s going to stay somewhere warm so
we didn’t have to wait an hour to show
what it look like this one’s been going
for an hour you can see that it’s twice
the size so that’s full of air created
by the yeast yeah you can see all the
bubbles where the dough is stretching
and this is you know perfect full of
lovely spring G bubbles so what we do
now is we want it we want to knock all
that air out and we want to knead it
again quickly before we put it into the
tin that we’re going to bake in so we do
a thing called knocking it back which
basically just involves punching it so
if you can punch it for me don’t be shy
and really go for okay alright just once
now we’re gonna need
if you flour the surface so that it
doesn’t stick that’s it and then just
knead it again like you did before just
to get the texture going again to get
the gluten working in the flour and to
get it back so we can shape it to this
in the right shape that we want to bake
into bread which is going to be in the
tin so we don’t have to do it for as
long this time
just to get it back to a similar texture
that it was before it we don’t want this
even that big tear it like this big tear
in it there we want to get rid of that
so this is big air bubbles at the moment
you want to like comparin compound it
also we’ve got nice little bubbles again
well that looks pretty good does it feel
smooth and springy yeah it can go in it
too – we’re going to cook it in this and
this is going to need oiling just a
little bit so it doesn’t stick so if you
put a splash of oil in olive oil yep
and then just move it around the tin
with your hands across the bottom and up
the sides great so that’s all ready and
then we’re going to roll this out to the
right sorta size for the tin so you need
a rolling pin bit more flour and because
it’s so springy because you’ve kneaded
it so well you’re gonna have to be quite
tough with it and show you who’s boss to
get it to the right size brilliant I go
into the middle and go that way not
rolling it back you roll it back on
itself sit and check what’s ticking
yep three so cute in now so this is
going to sit in that tin for another
hour and it’s going to double in size
like it did before and we want to push
lots of flavors in it so we’re going to
do it now because if we do it later
it’ll be full of air like a balloon and
then if we stop poking our fingers into
it it’ll push all of the air out until
deflate so we’re going to put our
flavors in we’re going to go with garlic
and rosemary
so pull the cloves of the ball so that
it rose beautifully in all the flavor
seeps out we’re going to squash them so
this is one of your nice skills take the
clothes you put it on its flat side so
he doesn’t roll around have the brunt of
the knife facing you and then with the
palm of your hand and your fingers
absolutely out of the way you squash it
that’s it ticking you carry on with
those great so that looks like an
absolute load of garlic doesn’t it but
because it’s going to roast in the oven
we’re going to put it with lovely Varian
olive oil it’s going to roast in the
oven and it’s going to become much more
mellow and a lot sweeter it’s going to
be delicious
and so Rosemarie and we don’t want the
woody stalks in the middle we just want
the nice flavors and leaves so we just
hold it at one end
and then run your fingers down the stalk
and push the leaves off lovely so
because this is naturally quite delicate
if that just sits on top of the bread
and bakes in the oven it’s going to burn
and go to crispy so we’re going to make
sure it’s liquid after in the oven and
I’m going to put some oil on so if you
just put a splash on bubbly and some bit
salt and pepper that’s it now I mix it
all up and scrunch it that’s when we get
all the tips of the oils out to the
rosemary same with the garlic too and
there’ll be loads of lovely flavors on
your fingers now and you want to we’re
going to push holes into the dough for
all that flavor to sit in so yeah yep do
you push them in and push your fingers
right to the bottom and stretch and
scrunch that’s it
great now I’m with the flavour and you
can push that in as well
pushing scrunch acid in a drizzle of
olive oil because that’s going to keep
it all nice and juicy
to make sure it doesn’t all spread you
out the bottle just put your thumb over
the top so you can control the flow and
just do a nice little drizzle all the
way over only bring so you’ve scrunched
all of those flavors in there and this
is going to do what the dough did before
so it’s going to prove again and double
in size so we’ll cover it with a tea
towel and we’ll keep it somewhere warm
and then this is what it’ll look like
after an hour so because we just put a
little bit of salt and pepper with thee
with the garlic and the rosemary when
you were scrunching it you can put a
little bit more on just before it goes
into the oven
beautiful so that’s all oven ready now
so that’s going to go into a preheated
oven at 220 for about 20-25 minutes and
it’s going to be all lovely and golden
and have a really nice lovely crunchy
surface and the way that you can test
for it is to tap it and we’ve got one in
the oven so I’ll show you what I mean so
when it’s baked after 25 minutes it
looks like this and you can tell it’s
good because you can tap it and it
sounds hollow you let that cool down
just a bit maybe for like 10 minutes and
then you can tip it down this is another
good way to tell if it’s cooked
tap it that’s it ready to eat it
properly it should be nice bubbling so
stir it so easy
Please follow and like us:
Be First to Comment