
chances are you’ve thrown these things
in the trash without even knowing it
but if you use them like this they’ll
spawn an electric arc ought enough to
melt any metal known to man and even
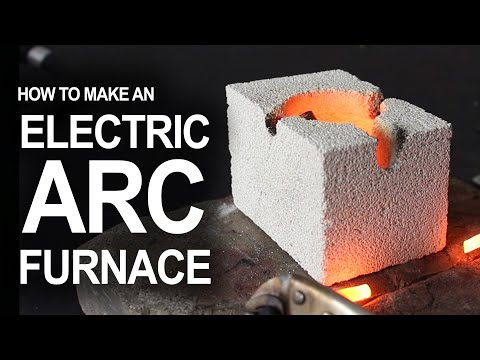
turn rocks into lava in this project
we’re modifying a fire brick and some
flashlight batteries to build an
electrical arc furnace on a budget let’s
start this project with a heavy-duty
Lantern battery and this alumina
silicate refractory brick the brick is
three inches tall four and a half inches
wide and nine inches long let’s get to
work making the furnace by measuring
lengthwise and marking it three inches
four and a half inches in six inches
this is where it needs to be cut so it’s
a good idea to draw perpendicular lines
with something like a combination square
to make it as accurate as possible now
get a mask ready because according to
the safety sheet silica dust is
something you really don’t want getting
into your lungs
these refractory bricks are extremely
lightweight and full of air bubbles
which is why they’re so great at
insulating heat but it also means we
won’t need any fancy tools to cut them a
simple wood saw is all you need because
the bricks are so soft
in reality you could probably carve them
out with kitchen utensils if you really
needed to I put a couple of bricks under
the edges to help channel the dust and
prevent the blade from scratching the
table when it cut through okay the three
lines are cut and you can see they
separate the brick into four pieces
I designed it this way so that one fire
brick will make two furnaces effectively
cutting the cost in half as well let’s
move on to carving out the reaction
chamber and giving the furnace some
special features I’m using a 3/8 inch
drill bit and a two inch Forstner bit I
got at my local hardware store the
Forstner bit makes it easy to target the
exact center of the brick and doesn’t
take much of an effort to begin chewing
away at the refractory material drilling
too fast could rip the brick apart so
let’s take it slow and steady until the
holes around two inches deep which
should leave a 1-inch base of insulation
at the bottom clean out the dust you’ll
see we’ve got a nice little chamber for
our reactions to take place now let’s
turn the brick on its side and use a 3/8
inch drill bit to burrow down near the
top when it penetrates into the chamber
keep going straight down into the other
side and when it pops out the bottom
gently push the bit outward to break
through the wall exposing the holes
let’s do the same thing with the front
end of the furnace except this time
we’re not going to go through the other
side we’ll need to modify this hole by
drilling inward at
a 45-degree angle until the tip of the
bit meets the bottom of the chamber if
we carefully work the bit upward until
it breaks loose and clean up the edges a
bit the bottom half of the furnace is
finished and looks awesome the holes on
the sides are for the electrode then
this last one has a dual purpose for
watching the reaction and pouring molten
metals now the two smaller pieces are
the lids for the furnace and should only
need a very small modification to 3/8
inch holes drilled one inch from the
ends and three-quarters of an inch from
the sides to form a place where we can
safely store the electrodes when they’re
glowing orange and too hot to put
anywhere else
speaking of electrodes we’re gonna need
carbon rods like these to strike the RF
because they’re the only things that’ll
handle the extreme temperatures I went
to a local Super Center and picked up a
2-pack of 6 volt lantern batteries for
under five dollars these ones are the
heavy-duty kind and don’t worry if
they’re newer use because completely
dead batteries will work just as well
now we need to crack open the container
and my tool of choice for doing that is
a pair of wire cutters if we break the
lid off the top and cut the two wires
holding it on we’ve got easy access to
the four battery cells inside go ahead
and snip the wires connecting the cells
together then pinch the caps in the
center and gently pry them upward with a
little bit of effort they should pop
right out of the casing and just like
that you’ve got a carbon electrode ready
to go but that’s not all these batteries
have all kinds of fun things hiding
inside the casings on these cells are
made of zinc and they’re packed with
manganese dioxide so use something like
a screwdriver to scrape around the
inside pulling all that crumbly gunk out
the manganese dioxide could be saved for
other experiments but in this project
we’re just interested in the carbon rods
and Azen casings and I’m really excited
because we just scavenged eight of them
now just for fun I went to the zinc
battery casings in my bench vise and
started cranking to see if it would make
the casings a bit smaller apparently you
can crush them down so they’re really
compact and that’s great because we need
them small for an experiment we’re gonna
try in just a minute the last thing we
need to make for the mini arc furnace is
a pair of adjustable stinger grips I
made a trip to the hardware store four
to five foot lengths of eight gauge
stranded copper wire to half-inch copper
couplings number twenty stainless steel
hose clamps and two sets of six inch
locking pliers I modified the pliers by
removing the rubber handle grips to
expose the metal then strip the end of
the cables to expose the copper so they
could be secured directly to the pliers
with the hose clamps
now if you put the copper couplings on
the other ends of the cables and Hammer
them flat or clamp them with a bench
vise they make little copper lugs you
can hook up to an arc welder for power
like this homemade version I put
together with microwave parts you might
remember that project where we Center
tap the two transformers so it could
power the arc furnace on 120 volts ac
however it works much better on 240
volts so let’s just leave it as is
now since the electrode grips are
adjustable they can be set to byte
perfectly on to any size carbon rod we
need and hold them firmly in place
but there is something you need to know
about these scavenged rods before you
use them the first time they make
electrical contact are gonna catch on
fire there’s some kind of wax in the
rods that burst into flames as soon as
they touch and it’ll take anywhere from
20 to 30 seconds to burn it all out it
generates a lot of heat and a lot of
smoke so try to do it outside and away
from anything flammable at this point
our mini arc furnace is completely ready
for operations so let’s test it out with
the zinc battery casings we scavenged
earlier with one casing in the chamber
let’s go ahead and set the lid in place
then power up the arc welder so the
electrodes are charged and ready for
action the magic happens when the rods
are pushed through the holes on the
sides and subtly bump into each other
striking a dangerous and blindingly hot
arc of electricity in less than 10
seconds you can see the rods are already
blazing hot and amazingly the metal is
already liquefied eight casings later
the chamber is full of liquefied zinc so
now that it’s runny let’s test out the
functionality of our built-in pour spout
this is how easy it is to transfer
molten metal from the mini arc furnace
into makeshift ingot moulds now zinc has
a relatively low melting point but this
furnace is resilient enough to tackle
high temperature metals like copper and
even steel as well so if you’re in the
mood to see glowing streams of molten
copper or sparks flying around the room
look for those extreme experiments in
another project video all right our zinc
muffin is hardened so let’s knock it out
of the muffin tray with a screwdriver
then dip it into a bowl of water to
quickly cool it the rest of the way the
result is a beautiful chunk of solid
zinc to add to our homemade metal
collection as a word of caution if you
breathe in any of the zinc oxide fumes
when melting zinc there’s a small chance
of catching metal fume fever so if
you’re recycling zinc yourself be sure
to wear a respirator or do your
experiments outside to reduce the
well now you know how to extract carbon
electrodes from old flashlight batteries
and carve insulating fire bricks into
custom arc reaction chambers by the way
if you cut the brick into 3 inch blocks
you’ll get 3 furnaces you can even
modify them to hold graphite crucibles
for smaller experiments well that’s it
for now if you liked this project
perhaps you’ll like some of my others
check them out at the king of random
calm hey guys thanks for watching this
has been one of my favorite projects so
far and I’d love to hear whether you
liked it as well so leave me a message
in the comments if you want to check out
some of my other project videos I
recommend the ones over here on the side
and if you haven’t already please
subscribe because I put out a new video
every five days now some of you have
told me you’re not getting notified of
my new releases so I’m going to show you
how to fix that right now but you have
to be on a computer to do it look under
this video for the subscribe button if
you’re not subscribed the button will be
read so click to subscribe then look for
a little gear icon next to it click the
gear icon and check the two boxes that
say send me updates and show only
uploads in feed if you’re lucky enough
to have a menu option change it from
occasionally to always and then click
Save and you’re done that’s how to do it
so take 10 seconds right now to update
your settings on my videos and you’ll
never miss an upload again thanks again
for joining me in this project and I’ll
see you in the next video talk to you
then
Please follow and like us:
Be First to Comment