
hi I’m Pete from Jamie’s food team and
today I’m going to show you how to shuck
an oyster
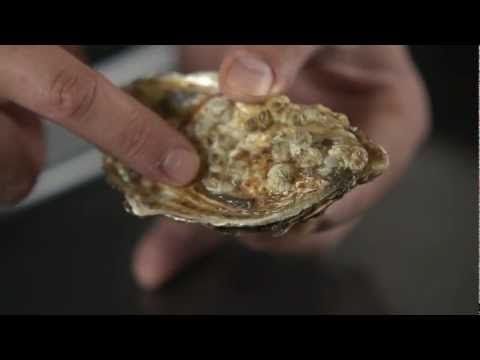
now this smoked oyster then as you can
see it’s got two shells facing one
another tightly clamped together and
what we’re gonna do is put a knife in
here in between the top shell and the
bottom shell and price the two shells
apart and this oysters still alive they
have to be alive if you want to eat them
safely and so it’s holding on pulling
its shells together it doesn’t want to
be opened so it’s it’s very tightly shot
so we have to open them in a very
particular way now you need a special
knife to open an oyster this is an
oyster knife and as you can see it’s got
wooden handle you can grip tightly and
it’s got a very short thick stiff blade
which is essential for opening oysters
what you don’t want to use is an
ordinary kitchen knife like that which
is not strong enough and if you try open
an oyster with it it will Bend the other
thing you mustn’t use is a sharp kitchen
knife like this with a sharp edge
because firstly it will Bend and you’ll
ruin your knife and secondly if you slip
I don’t think I have to tell you how
nicely that will be if the knife goes
into your hand or your wrist or anything
like that
moisturize are really they’re made for
the job they’re just short thick and
very strong which is what you need when
you’re opening an oyster the oyster
knives also got this hilt or a shield
here
so that when you do go into an oyster
you protect your knuckles here from the
shell now it’s open your oyster you know
hold it in your left hand work the knife
between the two shells and open them but
you still need a lot of force to get
this knife in and if it slips even
though there’s the nice blunt
you still don’t want that going into
your hand so what you do let’s take a
tea towel fold it up and put it in your
left hand or your right hand if you’re
left-handed pop the oyster in the middle
keep that piece of the cloth folded back
so you can see what you’re doing
but the oyster down on your tray I like
to open oysters on a tray so that any
juice that comes out is kept in the tray
if you can do it on a chopping water you
like but that means some of the juice
runs all over the table and you have to
clean it out
so easiest and least messy ways to do it
in the tray a lot of people stick the
knife into the Kings here to open the
oyster but I find it’s slightly easier
if you put into the edge so look for the
bit where the two shells join and you
can see see that white bit there that’s
the upper side of the bottom shell and
you can see the join just in there and
that’s where it put your knife tight
grip on the oyster push the knife into
the join then the top shell on the
bottom shell work your knife in then
once you’re in rotate a knife like that
and you cut the join between the top
Chow and the oyster then you can pull it
off
now you often have a little bit of shell
that’s broken so you can just pull that
out there’s your oyster now it’s still
stuck to the bottom shell so what you
need to do is take your knife just
scrape it free
on the bottom she’ll see a rooster he’s
nice and ready to eat and try and keep
the showers at level as you can to keep
as much of the oyster juice in the shell
as possible because that’s really quite
tasty and then you pop it on the ice so
same as before knife goes in slightly on
the side and to wiggle it in twist it
push the top shell off then once you get
a gap you can wear it with slowly the
knife down the shell and pull top shell
off the oyster here we go
scrape any bits of shell out there and
just loose it from the bottom and that’s
your oyster ready to eat here we go so
these oysters just been freshly opened I
like to serve them pretty much right
away but you can open a few ahead of
time if you want to get started and then
finish off the last few guests arrive
that’s not a problem but I wouldn’t do
something like open the day before and
then serve them the next day and that’s
how to shuck an oyster
Please follow and like us:
Be First to Comment