
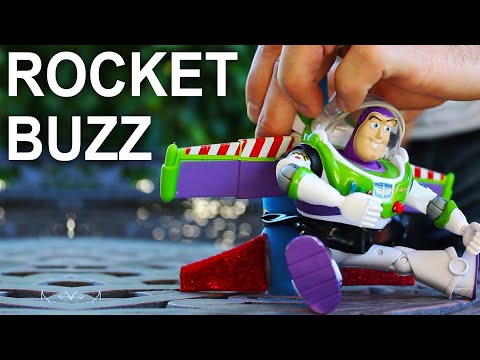
this toy refuses to believe he’s a toy
and thinks he can fly but rather than
crushes expectations let’s try using
some chemicals and craft supplies to
help get this little space Ranger a
little closer to living his dream to
start this project I went to the hobby
store for some glittering foam sheets
and a bottle of tacky glue I also picked
up a couple of f-class rocket motors and
you can see the code on the side
indicates this project really should not
be duplicated now we need a way to make
our glitter sheets a bit more rigid so
why not start by gluing a scrap piece of
cardboard to the backside of the foam
now this will start to curl up as it
dries so we should probably use
something like a heavy book to keep it
as flat as possible okay now that the
red sheet is drying let’s cut a
rectangle out of the blue foam and apply
a liberal coat of glue to that one as
well this piece is going to wrap around
the sides of the motor tube so if we
press it flat and carefully roll it up
this should form a cool blue rocket body
now let’s check on the red piece to see
how it’s doing I decided to trim the
excess material around the edges just to
make it a little more convenient to work
with and now we can add glue and fold
one of the edges back on itself to get a
double-sided glitter effect this piece
is going to be used to make the fins and
I’m going to use the corner of a piece
of cardboard as a template now I’m sure
you can already figure out how this is
going to work i trace three pieces the
same size then cut along the lines to
get these sparkly red fins that should
all be about equal alright let’s try
adding a bit of hot glue to the ends and
pressing them onto the rocket body now
this typically isn’t the best choice to
secure fins to a rocket but the foam is
porous enough to make a surprisingly
strong bond the next step is to make a
nose cone and we can do that by cutting
to the center of a circle then gluing it
around the top in a cone shape this will
help reduce the drag a bit but it’s
mainly just for looks now as a fun
finishing touch I pick up a package of
alphabet stickers and press them
directly onto the body tube at this
point our little rocket ship is ready
for action all we need now is a pilot my
three-year-old son said I could use his
Buzz Lightyear so we used a bit of black
electrical tape to strap them on
securely now this little guy is sporting
a powerful little rocket pack that’s
awesome but the problem is it’s
extremely unstable now we might be able
to balance it out a bit with a long
wooden
let’s secure the rocket at the top of
the dowel with some packing tape then
strap our Rockets here back into place
as we look for the center of gravity you
can see that just by adding a stick
we’ve shifted the CG behind the rocket
hopefully that’ll be enough to get this
to work but in either case our test
pilot looks excited and ready to go so
let’s push a fuse up into the nozzle and
try lighting it with sunlight unlike the
movie however this guy’s helmet can’t
actually focus the sunlight by itself
but I do have a two inch acrylic ball
that certainly can all we need to do now
is sit back and enjoy the show now it
looks like everything just exploded but
surprisingly our hero made it back with
hardly a scratch it looks like he wants
more so let’s go bigger
I made the bigger one by cutting a
toilet paper tube lengthwise secured it
to the motor with some glue then
reinforced the tube with a few wraps of
packing tape this made a compartment
just big enough for a makeshift
parachute I made this one from a garbage
bag and some dental floss you can see
here I reinforced the eyelet holes with
packing tape to prevent the plastic from
ripping next I glued some of the blue
foam around the rocket body push the
parachute into position then press the
nose cone to fit snugly at the top it
looks ready so let’s give it one final
pre-flight check then light it up and
back away
[Music]
here’s you came out yeah the parachute
came out alright but apparently we
should have added a shock cord because
dental floss isn’t very flame resistant
not to worry though because it looks
like our action hero still wants more I
went to the dollar store and got a pool
noodle on some flutter boards then glued
them together to make the biggest one I
tried building a makeshift launch pad
out of some wooden dowels and glued
little PVC risers on the sides to help
guide it during the launch now let’s get
ready for blast-off making sure our
captain is nice and comfortable
give him a big salute and wish him the
best on his journey to infinity and
beyond if you were to ask him I’m sure
you’d agree that flying a pool noodle
rocket was an epic way to end the day
well now you know how to use a few craft
supplies to give your favorite toys the
ride of their life but of course you
probably shouldn’t if you do want to
play with Rockets though try searching
for nearby rocketry clubs and see what
they’re up to
well that’s it for now if you like this
project perhaps you’ll like some of my
others check them out at the king of
random calm it’s incredible this guy
survived as well as he did this is one
of my little boys he’s the owner of the
Buzz Lightyear and the one who gave me
permission to use it in this project I
really couldn’t have done it without his
consent so shout out to you little buddy
I love you for me this video was
completely for fun it’s not a project
that should be duplicated at home it was
just for entertainment and for
educational purposes and I hope you’re
subscribed to my channel because I’ve
got some really cool projects coming up
where we’re going to be melting metal
making more rockets and doing some more
dry ice experiments so if you haven’t
already please subscribe to my channel I
put out a video every five days quick
clips project videos Mad Science and
light packs as always thanks for joining
me in this project video and I will look
for you in the next project video I’ll
see you then
Please follow and like us:
Be First to Comment