
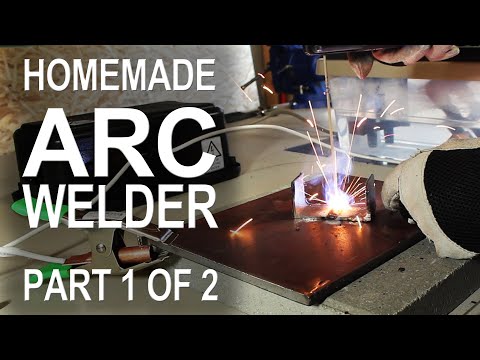
when I burned up the wires on my first
metal melter I decided to turn the
transformer core into a stick welder but
one transformer wasn’t enough to
actually make it weld anything in this
project we’ll be modifying to microwave
transformers because more transformers
means more power
[Music]
for this project I scavenge parts from a
couple more microwaves I found these for
free on my local classifieds not only
are we using twice as many transformers
here but twice as much power seriously
dangerous amounts of power these
transformers are roughly the same size
and look nearly identical except for the
placement of the bases using an angle
grinder we can cut down the seam of one
of the shallow welds holding this base
plate to the transformer the other seam
is a little trickier to get to but once
it’s cut you can see that the base plate
can now be removed fairly easily now
these next few steps are gonna look a
lot like the modification we did in the
metal melter project after grinding the
welds and opening the scene with a
chisel the AI section of the transformer
can be pulled back to reveal the
precious primary and secondary coils I
found that the primary coil can be
removed by gently prying up with a
chisel it’s important to work it out of
the transformer gently because the goal
is to keep this in perfect condition you
might remember there are two magnetic
shunts that get knocked out next and the
low voltage winding gets removed because
that won’t serve any purpose here now to
extract the secondary coil my method of
choice is to rest it loosely on the jaws
of a bench vise then use a rubber hammer
to knock down on the transformer until
the coil is free this one finished up
without any damage at all if you don’t
have a bench vise you can improvise with
a couple of blocks of wood in either
case your secondary coils can be
salvaged in near-perfect condition after
a quick cleanup of the paper and resin
our primary coil can be replaced on the
transformer with the terminals facing
down we’re going to be rewinding a new
secondary so it’s important that we have
the flat side facing up when it comes to
winding coils life will be a lot simpler
if we build a little jig I cut this
piece of scrap wood so that it’s as wide
as the centerpiece and just a little
shorter than the top the length is cut
so that it overhangs the edges by about
half an inch on either side we can
complete the form by adding a top and
bottom panel then forming a piece of
paper to fit the sides
at this point I think we’re about ready
to add some cable I found this 50 foot
length of wire on clearance at the
hardware store this is 8 gauge stranded
copper wire and cost me about 17 dollars
I’m going to use my advice to hold the
form in place and begin winding the
cable around the center of the form as
tightly as possible we need to build
this coil six turns high which isn’t too
difficult first layer but gets
progressively more challenging on the
second layer it might seem like it’s
near impossible on the third when it’s
packed together six turns high and three
layers deep the paper flaps can be
folded over and taped together now this
is the tricky part
we need to unscrew the top and bottom
panels to access our coil and separate
it out of the form while keeping it all
in one piece
I use some electrical tape to ensure the
coil wouldn’t unravel okay it’s time to
transplant our new secondary into the
transformer I have the best success by
using a clamp to pinch the sides in
while I push the coil down into place
let’s just double-check the coil sits
flush at the top and mix up some
two-part epoxy glue to finish up just
like the transformer in our metal melter
project the entire top area gets a
liberal coating of epoxy just before
sealing it back together in order for
this to form a strong bond the
connection will need a lot of pressure
holding it together while it sets this
is where a set of clamps or a bench vise
can be invaluable while our first
transformer is setting we can prepare
the second one in the exact same way our
second coil is 18 turns of 8 gauge wire
exactly like the first and Transplant it
just like before don’t worry too much
about which way the coil goes in it
doesn’t really matter yet finally we can
glue and clamp that together and leave
it to set for around 24 hours the final
result should look something like this
the connection is strong and the coils
are extremely snug so any vibrations
will be kept to a minimum well there you
have it the basic makings of an AC stick
welding system and these two electrodes
will eventually become our clamp and
from this point it really doesn’t take
much more to finish the system up and
turn it into a useful little hobby
welder look for how to do that in part
two well that’s it for now if you liked
this project perhaps you’ll like some of
my others check them out at the king of
random calm
[Music]
metal melter I decided to turn the
transformer core into a stick welder but
one transformer wasn’t enough to
actually make it weld anything in this
project we’ll be modifying to microwave
transformers because more transformers
means more power
[Music]
for this project I scavenge parts from a
couple more microwaves I found these for
free on my local classifieds not only
are we using twice as many transformers
here but twice as much power seriously
dangerous amounts of power these
transformers are roughly the same size
and look nearly identical except for the
placement of the bases using an angle
grinder we can cut down the seam of one
of the shallow welds holding this base
plate to the transformer the other seam
is a little trickier to get to but once
it’s cut you can see that the base plate
can now be removed fairly easily now
these next few steps are gonna look a
lot like the modification we did in the
metal melter project after grinding the
welds and opening the scene with a
chisel the AI section of the transformer
can be pulled back to reveal the
precious primary and secondary coils I
found that the primary coil can be
removed by gently prying up with a
chisel it’s important to work it out of
the transformer gently because the goal
is to keep this in perfect condition you
might remember there are two magnetic
shunts that get knocked out next and the
low voltage winding gets removed because
that won’t serve any purpose here now to
extract the secondary coil my method of
choice is to rest it loosely on the jaws
of a bench vise then use a rubber hammer
to knock down on the transformer until
the coil is free this one finished up
without any damage at all if you don’t
have a bench vise you can improvise with
a couple of blocks of wood in either
case your secondary coils can be
salvaged in near-perfect condition after
a quick cleanup of the paper and resin
our primary coil can be replaced on the
transformer with the terminals facing
down we’re going to be rewinding a new
secondary so it’s important that we have
the flat side facing up when it comes to
winding coils life will be a lot simpler
if we build a little jig I cut this
piece of scrap wood so that it’s as wide
as the centerpiece and just a little
shorter than the top the length is cut
so that it overhangs the edges by about
half an inch on either side we can
complete the form by adding a top and
bottom panel then forming a piece of
paper to fit the sides
at this point I think we’re about ready
to add some cable I found this 50 foot
length of wire on clearance at the
hardware store this is 8 gauge stranded
copper wire and cost me about 17 dollars
I’m going to use my advice to hold the
form in place and begin winding the
cable around the center of the form as
tightly as possible we need to build
this coil six turns high which isn’t too
difficult first layer but gets
progressively more challenging on the
second layer it might seem like it’s
near impossible on the third when it’s
packed together six turns high and three
layers deep the paper flaps can be
folded over and taped together now this
is the tricky part
we need to unscrew the top and bottom
panels to access our coil and separate
it out of the form while keeping it all
in one piece
I use some electrical tape to ensure the
coil wouldn’t unravel okay it’s time to
transplant our new secondary into the
transformer I have the best success by
using a clamp to pinch the sides in
while I push the coil down into place
let’s just double-check the coil sits
flush at the top and mix up some
two-part epoxy glue to finish up just
like the transformer in our metal melter
project the entire top area gets a
liberal coating of epoxy just before
sealing it back together in order for
this to form a strong bond the
connection will need a lot of pressure
holding it together while it sets this
is where a set of clamps or a bench vise
can be invaluable while our first
transformer is setting we can prepare
the second one in the exact same way our
second coil is 18 turns of 8 gauge wire
exactly like the first and Transplant it
just like before don’t worry too much
about which way the coil goes in it
doesn’t really matter yet finally we can
glue and clamp that together and leave
it to set for around 24 hours the final
result should look something like this
the connection is strong and the coils
are extremely snug so any vibrations
will be kept to a minimum well there you
have it the basic makings of an AC stick
welding system and these two electrodes
will eventually become our clamp and
from this point it really doesn’t take
much more to finish the system up and
turn it into a useful little hobby
welder look for how to do that in part
two well that’s it for now if you liked
this project perhaps you’ll like some of
my others check them out at the king of
random calm
[Music]
Please follow and like us:
Be First to Comment