
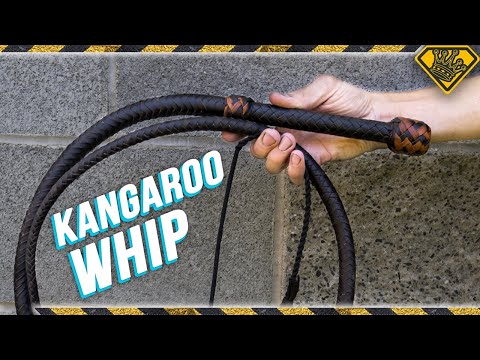
in today’s video we’re going to use the
lace cutter that we showed you how to
make previously cut a whole bunch of
lace and then follow a bunch of steps to
make a kangaroo hide bullwhip Garrett is
something of an expert on bullets at
least a whole lot more than me and in
fact if you’ve seen our video on how to
make the paracord and athletic tape
bullwhip Garrett is the one who taught
me how to do that in the first place
here is the idea we’re gonna be cutting
out a lot of kangaroo leather lace
wrapping twisting and braiding it around
itself to form a bullwhip we’ll take it
outside and give it a few tests in order
to make this six and a half foot can you
hide bullwhip we’re gonna start with a
paracord core and we’re gonna fill that
core with bb’s so our bullwhip will have
a little bit more heft and weight to it
there we go I measured about two feet in
I twisted this flattened piece of
paracord as you saw I pulled out the
core so it’s an empty hollow piece of
paracord and then I hit it with the
lighter just enough that it really
started melting and by squeezing it
together it basically just formed a
solid plastic bit in the middle so now
I’m going to fill two feet of this with
bb’s and while I do that Garrett is
gonna be cutting some more lace and
explaining how you know how thick your
lace should be so right now we’re
working on the very outside of the hide
and the outside is the most stretchy
part of the hide so I’m cutting my
strands to be fairly wide so I’m going
to be cutting about 30 feet of lace for
now that I’ve cut about 30 feet of lace
I’m gonna end this specific cut so the
way the way I’m gonna do that is I’m
gonna slowly kind of taper it off so I
still have a nice curvature on the end
of the finger pad now you can see this
outside part of this of the kangaroo
hide is actually pretty stretchy so the
next step we’re gonna do is to run this
through a little hook and kind of
stretch all the stretch out of it so
that we don’t have a loose braided whip
so to lubricate the strands I’ve brought
some of this homemade platting soap and
basically what this is is just a
multiplied lard soap and water and it’s
all kind of mixed together and then heat
it up and cooked in a stove and then let
to sit and turn into this kind of pasty
lardy substance and what we’re gonna do
stretch them is we’re going to lubricate
the strands with this plating soap so
this is gonna be our start and we’re
gonna wrap it around our hook so to
start stretching it then start pulling
it back and forth on this hook so as we
go along I’m gonna be adding more
platting soap to the strands
we’ve now stretched out this this was 30
feet before we stretched it out yeah and
it was definitely wider than this we can
sort of see the crazy difference here
this is what this looked like before
here it is after you can see how much
more narrow it is and it got a lot
darker too like this basically just
looks like black leather at this point
which is pretty neat okay Garrett we’ve
got the Strand er set back up why are we
running it back through the Strand er
yeah so as we stretch the strands
different parts of the leather stretch a
little bit more than others so we don’t
we didn’t have a completely consistent
width so we’re running it through the
Strand er one more time at a slightly
smaller width that way we can have it
completely or as most as possible a
consistent strand very cool 36 feet of
our now almost black kangaroo leather
lace so we need to cut 8 9 inches of
this clearance steel rod to make our bar
fit a little bit nicer into our paracord
we’re now just going to taper the top a
little bit just using a file so we’re
just going to use a piece of scrapped
kangaroo hide we’re in the latest down
and we’re going to measure how much we
need to wrap around this entire a little
PC so as we get our leather wrapped
around both the steel rod and the
paracord we’re then going to wrap it
we’re done we finished our whip yep yes
this is the completed the leather was
just for fun we are just about ready to
start platting our leather lace onto
this rod but this is a pretty slick
metal and our leather has some motion
all over it so we’re gonna take some of
this sinew and wrap it all the way
around this metal rod so it gets a lot
better grip and doesn’t just slide right
off so now we’re gonna want to find the
middle of each of these two strands and
then we’re gonna take at the bottom
right hand strand take it over the top
right hand strand and around behind and
in between the two left hand strands
flathead we have plaited our leather
lace – what is it 3 feet and 10 inches
down this whip 46 inches from the end of
the handle over there to where we’ve
braided it right here and so now what we
need to do is cut off the four pieces of
laces and wrap it closed with some of
our artificial sinew we’re going to
stair-step them all the way back so we
end the belly in a way that tapers so we
don’t have just a sudden end
so next we need to roll the whip so when
we roll the whip it kind of rounds out
all the edges and makes it about as
perfectly round as we can get I’m just
going to start on this end and work my
way down and back and I’m pushing with a
fair amount of course because I want it
to be as conflicted as possible you can
see a big difference in so unrolled here
rolled here you can see it fairly well
and you can definitely feel it I mean
this feels like it’s braided and this
just you can feel little bumps in it but
it doesn’t feel like the pieces of the
plat are sticking out the way they are
here so next we’re gonna put a cowhide
bolster on the outside of this whip so
basically we’re gonna cut a long
tapering triangle that’s going to cover
the entire surface of this whip and this
is going to help to kind of reinforce
all the area of the whip it’s gonna help
to make it as perfectly round as
possible fill in all the gaps and it’s
gonna just help add a little bit of
thickness as well so what I’m thinking
is we can take this squared up edge you
can fit that around any given part of
the whip curl it really tight and then
it can mark where it’s making contact
with the leather
[Music]
we also we want to make sure that the
bolster is completely straight over the
wit we don’t want it to kind of twist
around yeah we want we want a straight
[Music]
okay so we’re now going to be adding
leather dressing is this a homemade
thing or just a product that you buy no
this is just leather adjusting its this
is Picard the cards leather dressing
it’s pretty standard for what making one
thing that can happen with leather whips
that get dry if they’re not very well
conditioned on the inside is the core
will start to become kind of crusty and
as the different layers of the whip kind
of rub against each other you’ll
actually end up with a squeaky whip and
your whip will squeak anytime you move
it or trying to crack it under whoo and
the whip making process was like my whip
is kind of squeaky I wonder how I can
fix that I’ll try adding some weird goop
on the inside we’ve now wrapped the whip
all the way down to the end of the
leather and in fact even a little bit
beyond the cow leather bolster onto the
paracord just a bit and Garrett is
telling me that to reinforce it a little
bit more we actually want to keep
wrapping it a few times because we have
a metal stick to about right here and if
we try and crack our whip just the way
it is then it just can end up hinging
right on that point so much that it
breaks the leather over time so to
reinforce that we have to go over that a
few times so we’re gonna do is we’re
gonna keep wrapping with the sinew down
a couple feet and then back and then a
little bit less and then back and then
less again and then back and so we’re
just going to kind of be bouncing
smaller and smaller to give a really
tapered reinforcement we wrap the heck
out of this thing and you can see that
we don’t have a really sharp bending
point at the end of the handle or really
anywhere along there it just kind of
keeps going with this nice taper the
rolling edge that’s just what we want
and now we’re just gonna take this whole
thing and roll it again the same way we
did when we just had the belly so we’re
going to take our very high tech whip
rolling device
hi sell artisan whip rolling devices on
Etsy for $480 each check my page we’ve
now wrapped and rolled this whole thing
so Garrett what is their next step next
we are going to be cutting and prepping
the overlay strands more lace yeah so
we’re just gonna cut a bunch of long
strands we’re actually we have two hides
so I’m gonna work on a hiding you’re
gonna work on a hide let’s get cutting
[Music]
this leather that we’ve just cut out
we’re going to be cutting out 322 foot
pieces and that’s because we’re gonna be
ending in a six-point fall hitch so when
we reach the very end of the whip the
longest strands we’re gonna be using six
strands and then we’re gonna cut an 18
foot a 14 foot in a 10 foot and those
will get dropped at various points in
the whip I’m holding all our kangaroo
lace by the middles that we found when
we were cutting them I’m gonna do a
little bit of braiding to make a little
bit of a loop that will make it easy to
attach to our whip okay so I’m going to
take this first strand I’m gonna go
under over under over under over and I’m
just gonna kind of lay it over here let
me take this one and go under over so
that second one is just the opposite of
what the first one was yep I’m gonna
take this last strand this this is the
Strand that was all the way to the right
side the smallest strand I’m gonna take
it wrap it around and then under so this
under over under over pattern is called
right now at this point it looks like
we’ve got pretty much the whole handle
done and you said that’s about 8 inches
worth of handle yes
so four on the handle we did a diamond
plat which was an under one over 101
Juro and under 1 over 1 and if we did
that for the entire length of the whip
we would be here for 10 years in – it
would be a lot it would be a lot of work
and it wouldn’t be worth it so what
we’re gonna do is we’re gonna transfer
from a diamond plat to what’s called a
herringbone plat gonna take we’re gonna
go under these first three strands and
then over the next three strands and
we’re going to continue that pattern
down the thong
okay so as we go down the length of the
whip we actually have to drop strands
two strands that are shorter than the
rest be taken away from the sides where
I’m plotting and just going to go
straight into the core so they’re just
gonna be plaited around as if they are
part of the core now I’m gonna cut these
off but I don’t want it to be just like
an immediate stair step because I want
to have a nice smooth paper so to get
the best taper possible I’m gonna cut
these kind of long angles
now that we’ve finished the all the
breading of the overlay we need to add
the fall to make the fall we’ve cut
about four feet of paracord it’s not
going to be a exact science and we are
going to make a paper ball so it’s gonna
have a little bit of a tapered twist
that gets thinner and thinner and
thinner until it becomes just one strand
until we get to where the cracker starts
so the paracord has this inner guts to
it but pull this down as much as
possible we’re removing the guts from
both ends because the middle is where
it’s going to attach and then it’s gonna
be twisted up to a certain point they’re
not lining up again everything with the
whip wants to be tapered on one side the
guts are ending here on the other side
there anything here so we get smaller
and then smaller again just because we
always like to go in increments all the
way down the way we’re gonna twist this
we’re going to twist each strand in the
same direction and then it’s begin
twisting it around each other what we’re
gonna do now is thread one of these
strands into the other strand so it
becomes one slightly thicker strand and
this lacing needle has little threads on
the inside of it that we can thread on
to this paracord and it’ll hold on to it
tight so I’m going to take this strand
that’s been threaded into our lacing
needle I’m just gonna thread it straight
into dabbing on the side of the paracord
go right in
so now I’m just gonna run my finger
along here so that we get the exact same
length of each strand of paracord and
we’re gonna snip it off I’m gonna keep
my finger on here so they don’t move
then I’m going to fuse the inner and the
this is the last time we roll right
exactly okay this whip is looking really
sweet but it doesn’t have the iconic
handle decoration bits on it
what are we gonna do about that we’re
going to be adding a heel not in a
transition not for the heel not we’re
gonna build up a foundation using some
scrap leather and we’re gonna tack out
on with some nails in our official sinew
now we’re adding a second piece of
leather which is going to be kind of
cross-shaped we’re gonna put that over
the end of it okay now we have our heel
not foundation done now we’re going to
make a foundation for our transition
okay now we have our foundations done
now we’re going to go ahead and tie the
knots off
[Music]
there we go we’ve got the knots added on
to the handle we added a cracker on at
the end of it that’s gonna make it so we
can make that popping noise we love so
much I think we need to give this thing
a test let’s go let’s head outside let’s
get cracking we have come out siding it
is time to finally test this whip
there you go a fully functional kangaroo
hide whip Garrett thank you so much for
teaching us how to make these today yeah
no problem I had an awesome time doing
with you overall I think this took about
12 hours of work to do and we could
probably do it a little bit faster than
that if we weren’t filming at the same
time that always slows things down but I
would say that’s a good estimation for
how much time it would take for your
first time through Garrett if people are
interested in learning more about whip
making what do you suggest there were
two books that I actually thought were
super useful one when I was kind of
learning how to make leather whips the
first was how to make whips by Ron
Edwards another book that I thought was
really useful was whips and whip making
by David Morgan and it just gives you a
lot of general knowledge about two twips
in general all kinds of whips and it was
really really useful if you’re
interested there are links in the
description below of where you can get
your hands on those books guys that’s
not all we’ve got more for you to see
that box up the top will transport you
to our last video where we showed you
how to make the strand cutter that we
used a lot today the box at the bottom
will show you what YouTube things you
need to be watching next and this balm
in the middle will subscribe you to the
channel so you never miss a video don’t
forget to ring that Bell and we’ll see
you in the next one
talk to you then [Applause]
Please follow and like us: