
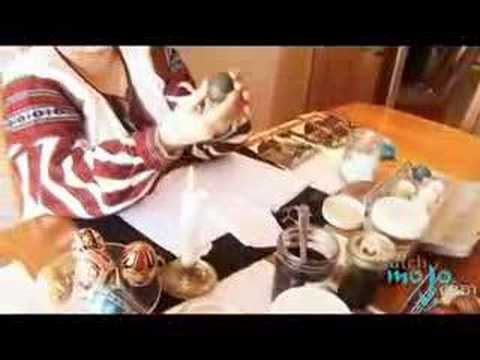
so what we do is we start with a white
fresh egg chicken egg goose egg any egg
we’d like and we do our first major lies
I’ve already drawn my major lines with a
pencil I have to take my tool which is
my Kiska and fill it up with some wax
and this is how it melts right in so
every time I touch the egg shell with
the beeswax in the end that that is the
color that it will remain so as you can
see we start with the white egg we do
our first major lines and then after
that we proceed to our next color but
before we go to the next color we have
to take our egg and we dip it in in a
water and vinegar solution what the
water and vinegar solution will do it
will clean off any excess oils fats and
dirt off the egg shell the procedure
goes from the cleansed egg we go to the
lightest color which will be our first
color which is yellow I’ll dip an egg
just to show you that it really goes
into the whole egg if I was to be
finishing my egg and I was going into
the darkest color I will dip the
complete egg in
there then where we can take it out
we’ve had it dry gently and we proceed
again with the beeswax and we make our
design again with our tool and we cover
with the beeswax we go to the next color
Pat it dry take it out to the next
design I have an egg here that I’ve
completed in the last stage as you can
see it’s full of beeswax except for the
last color there we don’t need to put
these wax on the last color and then
what we do is we we light up a candle
just gently approach the egg to the side
of the flame as the beeswax we can see
that it gets runny and wet so that means
it’s hot we just wipe it and there it is
and all our colors have been preserved
and once we’ve removed all the beeswax
off the shell of the egg we then proceed
into varnishing it we varnish it with a
floor varnish we let it dry and then we
have two options we either leave the egg
the way it is in its natural state it’s
raw it’s full it will eventually dry up
it does take a few years or we have the
other option of emptying it now emptying
it is a little bit of a trickier
procedure it requires making a hole in
one end of the egg and I’ll show you one
that has already been done here we can’t
even see the hole it’s so minuscule that
it you can’t even see it
and we have a special pump and we just
suck all the yellow and the white and we
rinse it aside and it remains just the
shell and that’s the end of our
procedure and of course we mustn’t
forget what do we do with the eggs we
don’t keep them we offer them as a gift
to our friends or family
our neighbors
[Music]
fresh egg chicken egg goose egg any egg
we’d like and we do our first major lies
I’ve already drawn my major lines with a
pencil I have to take my tool which is
my Kiska and fill it up with some wax
and this is how it melts right in so
every time I touch the egg shell with
the beeswax in the end that that is the
color that it will remain so as you can
see we start with the white egg we do
our first major lines and then after
that we proceed to our next color but
before we go to the next color we have
to take our egg and we dip it in in a
water and vinegar solution what the
water and vinegar solution will do it
will clean off any excess oils fats and
dirt off the egg shell the procedure
goes from the cleansed egg we go to the
lightest color which will be our first
color which is yellow I’ll dip an egg
just to show you that it really goes
into the whole egg if I was to be
finishing my egg and I was going into
the darkest color I will dip the
complete egg in
there then where we can take it out
we’ve had it dry gently and we proceed
again with the beeswax and we make our
design again with our tool and we cover
with the beeswax we go to the next color
Pat it dry take it out to the next
design I have an egg here that I’ve
completed in the last stage as you can
see it’s full of beeswax except for the
last color there we don’t need to put
these wax on the last color and then
what we do is we we light up a candle
just gently approach the egg to the side
of the flame as the beeswax we can see
that it gets runny and wet so that means
it’s hot we just wipe it and there it is
and all our colors have been preserved
and once we’ve removed all the beeswax
off the shell of the egg we then proceed
into varnishing it we varnish it with a
floor varnish we let it dry and then we
have two options we either leave the egg
the way it is in its natural state it’s
raw it’s full it will eventually dry up
it does take a few years or we have the
other option of emptying it now emptying
it is a little bit of a trickier
procedure it requires making a hole in
one end of the egg and I’ll show you one
that has already been done here we can’t
even see the hole it’s so minuscule that
it you can’t even see it
and we have a special pump and we just
suck all the yellow and the white and we
rinse it aside and it remains just the
shell and that’s the end of our
procedure and of course we mustn’t
forget what do we do with the eggs we
don’t keep them we offer them as a gift
to our friends or family
our neighbors
[Music]
Please follow and like us: