
so now I’m going to show you something
that’s new which is stamping on a
greeting card using watercolor inks if
you’ve never done this before I think
you’re going to be really happy with the
results so again our first step is going
to be cutting down our cardstock and
we’re going to cut it down to eight and
a half by five and a half we’re going to
fold it over line up your corners and
then use your bone folder to make a nice
crisp piece what we’re going to do is
we’re going to take our bottle that has
the watercolor painting it with the
spray and we’re going to hold it at a
good distance and we’re going to spray
onto our page you’ll notice that the
paper does start to curl a little so you
might want to keep an eye on that and
then take your stamp and we’re going to
measure the size of stamp that we’re
using this one is about one and a
quarter by three and three-quarters so
I’m going to cut a piece out of my white
card stock that is one and a half by
four and that’s what we’re going to be
stamping on to so turn your stamp over
and with thick water color pigment that
you’ve chosen just open them up and
because they’re in a sponge tip
applicator they’re really easy to apply
onto your stamp you just have to dab it
like that and then dab the color for
your flower now what we’re going to do
is you’re going to stamp when you’re
stamping you just want to press down
your image and apply even pressure you
don’t want to rock your stamp back and
forth or side to side because that will
give you a really shaky image so we’ve
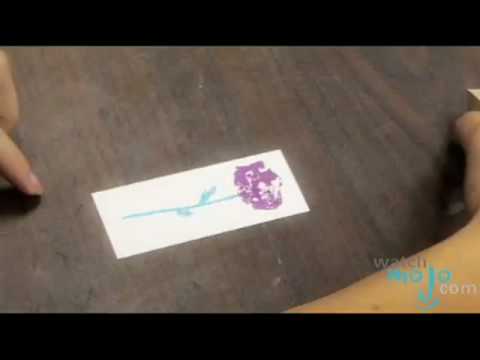
gone ahead and we’ve stamped our flower
and you’ll notice that as it dries the
watercolor has a bit of a metallic
pigment into it you just want to make
sure this is dry it does dry fairly
quickly because it is water-based you’re
just going to turn it over apply
adhesive and stick it on to the front of
your card now what’s different this time
is that we used a dark color card stock
so in order to be able to write in it
you’re actually going to have to use
some white cardstock cut it down to four
by five and a quarter you could even use
just regular bond paper if you want to
save on your card stock you’re just
going to glue that into the inside and
that is finished now that you know how
to use your rubber stamps it’s really
important to know how to take care of
them when you’re working with a wood
mounted
over stamp like this you never want to
run it under water to wash off your
anger your paint because that will cause
the wood to swell and the rubber to lift
off the block so the best way to do it
is to get some products that are made
especially for cleaning stamps like a
solution and a stamp scrubber the first
thing that you would want to do is spray
your stamp scrubber with the cleaning
solution then just wipe it off and then
wipe it on the dry side and that’s the
proper way to take care of your rubber
stamps
that’s new which is stamping on a
greeting card using watercolor inks if
you’ve never done this before I think
you’re going to be really happy with the
results so again our first step is going
to be cutting down our cardstock and
we’re going to cut it down to eight and
a half by five and a half we’re going to
fold it over line up your corners and
then use your bone folder to make a nice
crisp piece what we’re going to do is
we’re going to take our bottle that has
the watercolor painting it with the
spray and we’re going to hold it at a
good distance and we’re going to spray
onto our page you’ll notice that the
paper does start to curl a little so you
might want to keep an eye on that and
then take your stamp and we’re going to
measure the size of stamp that we’re
using this one is about one and a
quarter by three and three-quarters so
I’m going to cut a piece out of my white
card stock that is one and a half by
four and that’s what we’re going to be
stamping on to so turn your stamp over
and with thick water color pigment that
you’ve chosen just open them up and
because they’re in a sponge tip
applicator they’re really easy to apply
onto your stamp you just have to dab it
like that and then dab the color for
your flower now what we’re going to do
is you’re going to stamp when you’re
stamping you just want to press down
your image and apply even pressure you
don’t want to rock your stamp back and
forth or side to side because that will
give you a really shaky image so we’ve
gone ahead and we’ve stamped our flower
and you’ll notice that as it dries the
watercolor has a bit of a metallic
pigment into it you just want to make
sure this is dry it does dry fairly
quickly because it is water-based you’re
just going to turn it over apply
adhesive and stick it on to the front of
your card now what’s different this time
is that we used a dark color card stock
so in order to be able to write in it
you’re actually going to have to use
some white cardstock cut it down to four
by five and a quarter you could even use
just regular bond paper if you want to
save on your card stock you’re just
going to glue that into the inside and
that is finished now that you know how
to use your rubber stamps it’s really
important to know how to take care of
them when you’re working with a wood
mounted
over stamp like this you never want to
run it under water to wash off your
anger your paint because that will cause
the wood to swell and the rubber to lift
off the block so the best way to do it
is to get some products that are made
especially for cleaning stamps like a
solution and a stamp scrubber the first
thing that you would want to do is spray
your stamp scrubber with the cleaning
solution then just wipe it off and then
wipe it on the dry side and that’s the
proper way to take care of your rubber
stamps
Please follow and like us: