
hi I’m Samantha star and this is
watchmojo.com today I’m going to show
you how to make two simple yet
impressive greeting cards once you
realize how easy and inexpensive it is
to make your own greeting cards you’ll
be giving everyone something that is
handmade what we’re going to be using
today is a few new products we’re going
to be working with two different colors
of watercolor paint better in bottles
that have sponge tip applicator ‘he’s
we’re also going to be working with the
same style of paint but it’s in a spray
bottle as well you’re going to need a
rubber stamp and some stamp cleaning
products a bone folder and your basic
toolkit your ruler adhesive trimmer as
well as two patterned papers and two
solid card stocks so the first step is
going to be to take your solid colored
cardstock and cut it down to eight and a
half by five and a half when you’re
using a 12 x 12 sheet of paper you can
get two cards per sheet of cardstock so
what we’re going to do is we’re going to
use this as the base of our card so
simply fold it in half and use your bone
folder to flatten the edge what we’re
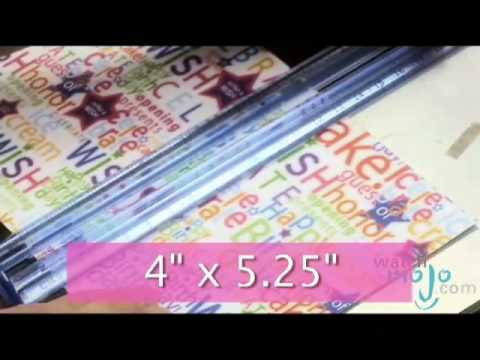
going to do next is cut that piece of
this pattern paper for the front of our
card so we’re going to cut it down to
four by five and a quarter we’re going
to start with cutting on the five and a
quarter because of the way that our
pattern is running so we’re going to cut
it at five and a quarter and then four
and that’s going to be the front of our
card I’ve selected another piece of
patterned paper that has a lot of
different sayings on it that revolve
around birthdays so we’re going to pick
one of them out I’m just going to go for
the one in the top corner that’s his
happy birthday and you’re going to slice
along the line and then we’re going to
cut it again
and then to make it show up a little bit
I think we’ll use the back of one of our
pavers what I generally have the habit
of doing is gluing down and then
trimming around but if you are a
perfectionist you can go ahead and
measure it so the block that I cut out
is three and a quarter by two so I’m
going to cut at two and a quarter by
three and a half and then I’m just going
to use my adhesive and I’m going to glue
our little sentiment on to the blue and
I’m going to glue the first piece that
we cut onto the card and we’re going to
just glue our sentiments right onto the
front of the part and that is pretty
much done when you’re making your own
greeting cards it’s important to
purchase your envelopes ahead of time so
when you make your cards you know what
size to make them to remember that there
are standard card sizes and you don’t
want to make your greeting cards and
realize that you have nothing to mail
them in
you
watchmojo.com today I’m going to show
you how to make two simple yet
impressive greeting cards once you
realize how easy and inexpensive it is
to make your own greeting cards you’ll
be giving everyone something that is
handmade what we’re going to be using
today is a few new products we’re going
to be working with two different colors
of watercolor paint better in bottles
that have sponge tip applicator ‘he’s
we’re also going to be working with the
same style of paint but it’s in a spray
bottle as well you’re going to need a
rubber stamp and some stamp cleaning
products a bone folder and your basic
toolkit your ruler adhesive trimmer as
well as two patterned papers and two
solid card stocks so the first step is
going to be to take your solid colored
cardstock and cut it down to eight and a
half by five and a half when you’re
using a 12 x 12 sheet of paper you can
get two cards per sheet of cardstock so
what we’re going to do is we’re going to
use this as the base of our card so
simply fold it in half and use your bone
folder to flatten the edge what we’re
going to do next is cut that piece of
this pattern paper for the front of our
card so we’re going to cut it down to
four by five and a quarter we’re going
to start with cutting on the five and a
quarter because of the way that our
pattern is running so we’re going to cut
it at five and a quarter and then four
and that’s going to be the front of our
card I’ve selected another piece of
patterned paper that has a lot of
different sayings on it that revolve
around birthdays so we’re going to pick
one of them out I’m just going to go for
the one in the top corner that’s his
happy birthday and you’re going to slice
along the line and then we’re going to
cut it again
and then to make it show up a little bit
I think we’ll use the back of one of our
pavers what I generally have the habit
of doing is gluing down and then
trimming around but if you are a
perfectionist you can go ahead and
measure it so the block that I cut out
is three and a quarter by two so I’m
going to cut at two and a quarter by
three and a half and then I’m just going
to use my adhesive and I’m going to glue
our little sentiment on to the blue and
I’m going to glue the first piece that
we cut onto the card and we’re going to
just glue our sentiments right onto the
front of the part and that is pretty
much done when you’re making your own
greeting cards it’s important to
purchase your envelopes ahead of time so
when you make your cards you know what
size to make them to remember that there
are standard card sizes and you don’t
want to make your greeting cards and
realize that you have nothing to mail
them in
you
Please follow and like us: