
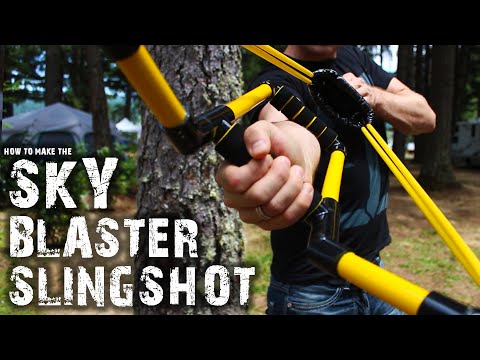
for this project I’m going to show you
how to make a water balloon slingshot
that’ll give you power and prestige
while defending and dominating your next
water fight this sling bow will lob
water bombs over a hundred and fifty
feet away and wreak havoc on friends and
family
not to mention it’ll shoot up to three
balloons at a time let’s start this
project with a trip to the hardware
store for half-inch PVC tubing and a
handful of sprinkler fittings these
adapters are all pretty standard you
should be able to find them at a home
improvement or sprinkler supply outlet
near you I went ahead and cut the tubing
into 1 and 3/4 inch 2 inch 5 inch and 10
inch pieces so we can jump right in and
get busy connecting them all together
now just like any PVC project it’s a
really good idea to dry fit everything
together just to make sure all the
pieces are gonna fit before you glue
them together and it’s a good idea to
practice putting an angle on the bow
Forks first by propping the handle on a
small box then simply pushing the prongs
down on either side until they touch the
table this will angle both sides
symmetrically without the need for any
precision instruments the basic frame
for your sling bow should look something
like this and if it does then the next
step is to cement it together so it can
take some abuse to make my connections
I’m using a fast set cement because it’s
lightning fast when it sets and doesn’t
require a primer to clean the
connections first however it’s really
important to follow the directions on
the back to make sure your connections
are as strong as possible because you
don’t want your bow breaking under
pressure cement it together one
connection at a time and be prepared to
work quickly because once two pieces
touch you only have about five seconds
to get them into place before they lock
up and won’t move anymore that’s why
using a box to help set the angle can
make all the difference and whether you
get them into position with enough time
to spare now you can see I glued all the
pieces together except for the two
inside tubes and that’s important
well glue these together in a minute but
for now make sure to keep them separate
in the meantime let’s take our bow frame
to the next level with a couple cans of
spray paint
of course I colored mine black and
yellow but you can paint yours any color
you want or even use duct tape to make a
quick and easy custom wrap like we did
for the laser blowgun you’ll see how to
make this in another project video okay
now that we’ve got our custom colors
we’re ready to add the sling I found a
50-inch workout band in the sporting
goods section of a local Super Center
and coincidentally it’s black and yellow
as well which matches my color scheme
perfectly
these bands have a handle at either end
which we won’t actually need so go ahead
and chop them off with a pair of
scissors but don’t throw them away just
yet let’s salvage the padded foam
handles and repurpose them for our sling
bow instead cut the strap off the
handles and carefully pull the padding
off so you’re left with just the foam
exteriors twist them onto the outside of
the half-inch PVC pipe and you should
finally make a perfect fit and stretch
the entire length of the tubes now
before we glue the handles back on the
frame we actually need to roll the ends
of the foam down a little so they’re out
of the way both sides should be folded
back so there’s enough space to glue the
ends without any glue touching the foam
if there is then go ahead and apply the
cement to the connections and twist them
together like you did the others do the
same thing with all four connections and
give it about two minutes for the cement
to begin curing then unroll the ends of
the foam so they overlap part of the PVC
tee which you can see gives us a nice
handle grip with the padded foam handles
in place the frame is finished and
looking good let’s move on to making the
sling next we need a way to join the two
ends of the rubber tubing together and I
found a really effective way to do that
is with a disposable pen take the pen
apart and cut two to three inches off
the tube then carefully use one of the
blades on your scissors to score angled
markings down the sides do this as many
times as you can on both ends making
sure the plastic is scored at about a 45
degree angle away from the tips now it’s
gonna take a bit of effort but you need
to push half of the pen inside the
tubing so apply some pressure and wiggle
it around and eventually it’ll slide
into place push the other end of the
tubing on the same way until put with
pieces but up next to each other and
become one it should be hard to tell
where they join and if you pull them
apart as hard as you can the grooves in
the pen should lock onto the rubber and
prevent the joint from coming apart all
right now that we’ve got an enormous
homemade rubber band it’s time to make
the launching pouch and all we need for
that is roll of duct tape
most duct tape is 2 inches wide and we
need four strips cut around 18 inches
long while you’re here cut four more
strips about 14 inches as well
carefully overlap the longer strips just
a bit and press them together so you can
effectively double the width of the tape
if you do that with all four pieces you
should end up with a nice large piece of
duct tape fabric with the sticky side
facing up now just for convenience I
marked the tape so you can see where
everything will get attached and if you
center two of the 14 inch strips facing
down and press them into place you
should be left with 4 inches
in the center and five inches on the
sides carefully wrap the tape around to
the backside and press it smooth but
keep the two black strips facing upward
because we’ll need them for attaching
this to the tubing next now bring back
the big rubber band and stretch it
sideways so the band’s lay exactly on
top of the black strips and double check
the pen tube connection is in the center
pull the one side of the material over
the tube and press the sticky side down
so it adheres to the inner pad then
smooth the tape until it’s flat the
other side gets folded over next and
smooth down as well the same way
alright the pouch is nearly done and you
can see how this design lets it slide
freely up and down the band making it
easily adjustable the only thing our
launcher needs now is a handle grab the
last two strips of duct tape and fold
one of the strips lengthwise into thirds
then wrap the other piece of tape around
it to make it even stronger now cut two
slits in the center of the pouch about
two inches from either end so you can
weave the strap through both of the
holes and we pull it flat it should look
like this trim the ends of the strap so
that when you fold them in toward the
middle they meet the edge of the handle
in the center surprisingly all it takes
to hold them securely in place as a five
inch strip of tape so just lay one over
top and press it down smooth our
launcher is finished and looking good so
let’s go ahead and attach it to the bow
start by lining the ends of the tubing
up with the grooves and the tips of the
bow then double check that the tubing is
symmetrical with the pouch exactly in
the center grab one side and stretch the
rubber down as hard as you can
rocking it back and forth so it slips
inside the groove then use something
like a four inch cable strap to pinch
the tubes tightly together at the bottom
now simply cut the ends off the zip ties
making sure they’re smooth and double
check the rubber is held firmly in the
grooves of the tip if they are then
you’re done and ready for action I
thought it would be fun to test my sky
blaster slingshot on a recent camping
trip with some friends and family if you
look closely at the pouch when it gets
pulled back you’ll see it automatically
cups itself which means it’ll grip onto
balls or water balloons securely until
they’re released just for fun I loaded
up a bucket with over a hundred water
balloons ready for blasting so we could
have some fun and test it out the
slingshot gets loaded by placing a water
balloon in the pouch while it’s facing
upward pull back to lock on to it then
fire when ready
with only a bit of effort you’ll be able
to send balloons soaring high into the
sky and up to 150 feet away
to get the best leverage try shooting
like a bow and as you practice your
shots can get incredibly powerful and
impressively accurate as well I tried
going for distance so you can see this
one landed 168 feet away and I’m
confident that some of you will get them
even farther than that if you want even
more power try lying on your back and
resting your feet on the prongs to send
your payload even further now depending
on what kind of resistance bands you get
you’ll be able to make sling pose any
custom color scheme you want and what’s
really cool is you can make as many as
you want for around 10 bucks each but
check this out I found a box of 2
slightly shorter resistance tubes for
the same price as one long one which
means you can effectively cut the cost
of the rubber in half and make two
slingshots for the price of one and just
for fun I rigged up a duct tape arm band
that slides down over the frame and
holds the contraption tightly to my arm
which prevents the end from kicking out
on release the sling bow will launch up
to three balloons simultaneously but if
you’re thinking of shooting them at
friends or family there’s something you
need to know first the balloons hit hard
enough to leave welts so make sure any
one being used for target practice is
okay with it before you open fire
and if you’re not in the mood to get
anyone wet try using your sling bow to
launch one of the sky balls we made in
another project video you’ll see they
open up around 40 or 50 feet high in the
air and they’re guaranteed outdoor fun
for everyone
so keep an eye out for how to make these
sky balls in another video well now you
know how to convert duct tape and
resistance rubber into a powerful water
balloon slingshot and if you don’t want
to spend money on workout bands you can
always try modifying a bag of rubber
bands instead I quickly braided a
hundred of them into a rubber rope that
makes an impressively effective and
low-budget alternative well that’s it
for now if you liked this project
perhaps you’ll like some my others check
them out at the king of random calm
what’s up guys thanks for watching my
video to the end and if you’re ready to
get to work building one of these bad
boys for yourself I’ve got something
that might help I just created a set of
high-quality step-by-step instructions
for this project that you can download
instantly so you’ll have a hard copy you
can reference while you’re building your
slingshot I designed this project PDF to
be as user friendly as possible with
high quality pictures step-by-step
instructions as well as some helpful
hints and fun facts to help you on your
way they’ll be for sale on my webpage
for ten dollars so just click here on
the screen or check the video
description for the link on where to get
it and if you get a copy before the end
of the month you’ll automatically be
entered to win one of the sky blaster
slingshots from this video
now to make this an even sweeter deal
for you my subscribers I put a private
link in the description to where you can
get this project PDF for only 295 at 60%
off and just for you for watching my
videos so there you go see how you’re
helping to support me and in return I
can keep making more projects and videos
for you by the way if you download my
PDF but don’t feel like it was worth
your money I’ll give your money back how
about that so you’ve got nothing to lose
click here to get yourself a copy and at
least get your name on the list to win a
slingshot thanks again for supporting me
and my project I appreciate you and I’ll
see you around in the next project video
back to you then
[Music]
how to make a water balloon slingshot
that’ll give you power and prestige
while defending and dominating your next
water fight this sling bow will lob
water bombs over a hundred and fifty
feet away and wreak havoc on friends and
family
not to mention it’ll shoot up to three
balloons at a time let’s start this
project with a trip to the hardware
store for half-inch PVC tubing and a
handful of sprinkler fittings these
adapters are all pretty standard you
should be able to find them at a home
improvement or sprinkler supply outlet
near you I went ahead and cut the tubing
into 1 and 3/4 inch 2 inch 5 inch and 10
inch pieces so we can jump right in and
get busy connecting them all together
now just like any PVC project it’s a
really good idea to dry fit everything
together just to make sure all the
pieces are gonna fit before you glue
them together and it’s a good idea to
practice putting an angle on the bow
Forks first by propping the handle on a
small box then simply pushing the prongs
down on either side until they touch the
table this will angle both sides
symmetrically without the need for any
precision instruments the basic frame
for your sling bow should look something
like this and if it does then the next
step is to cement it together so it can
take some abuse to make my connections
I’m using a fast set cement because it’s
lightning fast when it sets and doesn’t
require a primer to clean the
connections first however it’s really
important to follow the directions on
the back to make sure your connections
are as strong as possible because you
don’t want your bow breaking under
pressure cement it together one
connection at a time and be prepared to
work quickly because once two pieces
touch you only have about five seconds
to get them into place before they lock
up and won’t move anymore that’s why
using a box to help set the angle can
make all the difference and whether you
get them into position with enough time
to spare now you can see I glued all the
pieces together except for the two
inside tubes and that’s important
well glue these together in a minute but
for now make sure to keep them separate
in the meantime let’s take our bow frame
to the next level with a couple cans of
spray paint
of course I colored mine black and
yellow but you can paint yours any color
you want or even use duct tape to make a
quick and easy custom wrap like we did
for the laser blowgun you’ll see how to
make this in another project video okay
now that we’ve got our custom colors
we’re ready to add the sling I found a
50-inch workout band in the sporting
goods section of a local Super Center
and coincidentally it’s black and yellow
as well which matches my color scheme
perfectly
these bands have a handle at either end
which we won’t actually need so go ahead
and chop them off with a pair of
scissors but don’t throw them away just
yet let’s salvage the padded foam
handles and repurpose them for our sling
bow instead cut the strap off the
handles and carefully pull the padding
off so you’re left with just the foam
exteriors twist them onto the outside of
the half-inch PVC pipe and you should
finally make a perfect fit and stretch
the entire length of the tubes now
before we glue the handles back on the
frame we actually need to roll the ends
of the foam down a little so they’re out
of the way both sides should be folded
back so there’s enough space to glue the
ends without any glue touching the foam
if there is then go ahead and apply the
cement to the connections and twist them
together like you did the others do the
same thing with all four connections and
give it about two minutes for the cement
to begin curing then unroll the ends of
the foam so they overlap part of the PVC
tee which you can see gives us a nice
handle grip with the padded foam handles
in place the frame is finished and
looking good let’s move on to making the
sling next we need a way to join the two
ends of the rubber tubing together and I
found a really effective way to do that
is with a disposable pen take the pen
apart and cut two to three inches off
the tube then carefully use one of the
blades on your scissors to score angled
markings down the sides do this as many
times as you can on both ends making
sure the plastic is scored at about a 45
degree angle away from the tips now it’s
gonna take a bit of effort but you need
to push half of the pen inside the
tubing so apply some pressure and wiggle
it around and eventually it’ll slide
into place push the other end of the
tubing on the same way until put with
pieces but up next to each other and
become one it should be hard to tell
where they join and if you pull them
apart as hard as you can the grooves in
the pen should lock onto the rubber and
prevent the joint from coming apart all
right now that we’ve got an enormous
homemade rubber band it’s time to make
the launching pouch and all we need for
that is roll of duct tape
most duct tape is 2 inches wide and we
need four strips cut around 18 inches
long while you’re here cut four more
strips about 14 inches as well
carefully overlap the longer strips just
a bit and press them together so you can
effectively double the width of the tape
if you do that with all four pieces you
should end up with a nice large piece of
duct tape fabric with the sticky side
facing up now just for convenience I
marked the tape so you can see where
everything will get attached and if you
center two of the 14 inch strips facing
down and press them into place you
should be left with 4 inches
in the center and five inches on the
sides carefully wrap the tape around to
the backside and press it smooth but
keep the two black strips facing upward
because we’ll need them for attaching
this to the tubing next now bring back
the big rubber band and stretch it
sideways so the band’s lay exactly on
top of the black strips and double check
the pen tube connection is in the center
pull the one side of the material over
the tube and press the sticky side down
so it adheres to the inner pad then
smooth the tape until it’s flat the
other side gets folded over next and
smooth down as well the same way
alright the pouch is nearly done and you
can see how this design lets it slide
freely up and down the band making it
easily adjustable the only thing our
launcher needs now is a handle grab the
last two strips of duct tape and fold
one of the strips lengthwise into thirds
then wrap the other piece of tape around
it to make it even stronger now cut two
slits in the center of the pouch about
two inches from either end so you can
weave the strap through both of the
holes and we pull it flat it should look
like this trim the ends of the strap so
that when you fold them in toward the
middle they meet the edge of the handle
in the center surprisingly all it takes
to hold them securely in place as a five
inch strip of tape so just lay one over
top and press it down smooth our
launcher is finished and looking good so
let’s go ahead and attach it to the bow
start by lining the ends of the tubing
up with the grooves and the tips of the
bow then double check that the tubing is
symmetrical with the pouch exactly in
the center grab one side and stretch the
rubber down as hard as you can
rocking it back and forth so it slips
inside the groove then use something
like a four inch cable strap to pinch
the tubes tightly together at the bottom
now simply cut the ends off the zip ties
making sure they’re smooth and double
check the rubber is held firmly in the
grooves of the tip if they are then
you’re done and ready for action I
thought it would be fun to test my sky
blaster slingshot on a recent camping
trip with some friends and family if you
look closely at the pouch when it gets
pulled back you’ll see it automatically
cups itself which means it’ll grip onto
balls or water balloons securely until
they’re released just for fun I loaded
up a bucket with over a hundred water
balloons ready for blasting so we could
have some fun and test it out the
slingshot gets loaded by placing a water
balloon in the pouch while it’s facing
upward pull back to lock on to it then
fire when ready
with only a bit of effort you’ll be able
to send balloons soaring high into the
sky and up to 150 feet away
to get the best leverage try shooting
like a bow and as you practice your
shots can get incredibly powerful and
impressively accurate as well I tried
going for distance so you can see this
one landed 168 feet away and I’m
confident that some of you will get them
even farther than that if you want even
more power try lying on your back and
resting your feet on the prongs to send
your payload even further now depending
on what kind of resistance bands you get
you’ll be able to make sling pose any
custom color scheme you want and what’s
really cool is you can make as many as
you want for around 10 bucks each but
check this out I found a box of 2
slightly shorter resistance tubes for
the same price as one long one which
means you can effectively cut the cost
of the rubber in half and make two
slingshots for the price of one and just
for fun I rigged up a duct tape arm band
that slides down over the frame and
holds the contraption tightly to my arm
which prevents the end from kicking out
on release the sling bow will launch up
to three balloons simultaneously but if
you’re thinking of shooting them at
friends or family there’s something you
need to know first the balloons hit hard
enough to leave welts so make sure any
one being used for target practice is
okay with it before you open fire
and if you’re not in the mood to get
anyone wet try using your sling bow to
launch one of the sky balls we made in
another project video you’ll see they
open up around 40 or 50 feet high in the
air and they’re guaranteed outdoor fun
for everyone
so keep an eye out for how to make these
sky balls in another video well now you
know how to convert duct tape and
resistance rubber into a powerful water
balloon slingshot and if you don’t want
to spend money on workout bands you can
always try modifying a bag of rubber
bands instead I quickly braided a
hundred of them into a rubber rope that
makes an impressively effective and
low-budget alternative well that’s it
for now if you liked this project
perhaps you’ll like some my others check
them out at the king of random calm
what’s up guys thanks for watching my
video to the end and if you’re ready to
get to work building one of these bad
boys for yourself I’ve got something
that might help I just created a set of
high-quality step-by-step instructions
for this project that you can download
instantly so you’ll have a hard copy you
can reference while you’re building your
slingshot I designed this project PDF to
be as user friendly as possible with
high quality pictures step-by-step
instructions as well as some helpful
hints and fun facts to help you on your
way they’ll be for sale on my webpage
for ten dollars so just click here on
the screen or check the video
description for the link on where to get
it and if you get a copy before the end
of the month you’ll automatically be
entered to win one of the sky blaster
slingshots from this video
now to make this an even sweeter deal
for you my subscribers I put a private
link in the description to where you can
get this project PDF for only 295 at 60%
off and just for you for watching my
videos so there you go see how you’re
helping to support me and in return I
can keep making more projects and videos
for you by the way if you download my
PDF but don’t feel like it was worth
your money I’ll give your money back how
about that so you’ve got nothing to lose
click here to get yourself a copy and at
least get your name on the list to win a
slingshot thanks again for supporting me
and my project I appreciate you and I’ll
see you around in the next project video
back to you then
[Music]
Please follow and like us: