
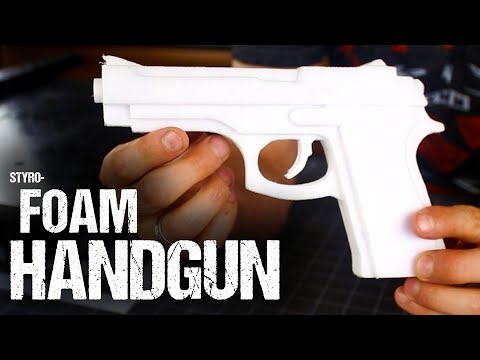
for this project I’m going to show you
how to make a cool 3d handgun out of
styrofoam that you can use for props
cosplay or even backyard metal casting
to get started we’ll first need to whip
out the hot wire styro-slicer’ we made
in a previous video and watch this
simply unbuckle the latch on the side
and you can have the whole thing set up
and ready to slice foam in under 10
seconds and like most of my other
styrofoam creations this pistol all
starts with dollar-store foam board
I like these sheets of foam because
they’re all about the same thickness and
once the paper layers are peeled off the
front in the back they’re really easy to
work with if you want to make the same
gun I used in my styrofoam – aluminum
video then you’ll just need to print off
two copies of this template I made in
Photoshop I base this template around a
design I found on YouTube for an m9
rubber band handgun by RB guns and I put
links in the description to where you
can find them for free go ahead and cut
out all the shapes and lay them on the
table and you should end up with 11
tracing templates which are basically
all just mirror images of each other
these pistol parts are designed to stack
together to form a really cool looking
3d prop but we need to carve the custom
parts out of the phone first so let’s
get to work making that happen next
smear the surface of the paper templates
with a glue stick and focus on getting
good coverage around the edges so you
can transfer the paper to the foam and
stick them firmly in place
alright the time has come to power up
the styro-slicer’ and the first thing I
like to do is chop the board into
smaller pieces to make the templates a
bit more manageable to work with from
here it’s pretty easy to glide around
the edges of the individual shapes and
trace them out with an impressively
professional finish it always amazes me
how the wire slices through the foam so
easily but not through the paper
templates themselves but that’s exactly
why this works now when you’re preparing
to cut around the trigger-guard it’s not
as difficult as it might seem the
styro-slicer’ actually has a cool little
feature that’ll make it quick and easy
for you just poke a decent-sized hole in
an area you don’t need then turn off the
power and give the wire a couple seconds
to cool down you can simply unhook the
spring from the eye bolt at the top
thread the wire through the hole in the
trigger guard and rehook the spring back
onto the eye bolt as easy as that you’ve
got the ability to make detailed inside
cuts and some of the hardest to reach
places alright we’ve got all the
components manufactured and we’re just
about ready to assemble the foam weapon
all that’s left to do is remove the
paper and glue it together slowly and
carefully peel the templates off the
foam the same way you did with the board
in the beginning
and if you’re careful enough you’ll be
able to reuse them again now to assemble
this foam firearm simply lay the pieces
out so you can better visualize how
they’re going to stack together and just
for planning purposes each half of your
handgun needs to look like this if
you’re ready to commit to this design
then go ahead and apply a generous
amount of glue to the backs of foam
components and carefully set the pieces
in place the slide assembly and the
pistol grip go on last and should line
up with some of the obvious features on
the base and the last little piece is
just for decoration so push it into the
little gap in the middle this completes
one half of the gun and we’ll need to
assemble the other side the same way but
make sure this other side is pointing
the opposite direction that’s important
with the two sides complete you should
have twin half pistols that are mirror
images of each other so if you do then
let’s make the two become one
smear a generous amount of glue on each
of the bottoms then slowly and carefully
line up the two halves and gently press
them together double-check the edges
match up on every side and give it a few
minutes for the glue to start setting
and with that your styrofoam sidearm is
pretty much done now to polish it up a
bit try using a 220 grit sanding sponge
to smooth out any imperfections the foam
is pretty soft so by lightly sanding it
you can get your gun to clean up really
nice with a hand gun sanded the very
last step is to add the small circle to
the tip completing the barrel and that’s
it you’ve just made yourself a really
cool looking 3d foam pistol that you can
use for props or cosplay of course if
you want to take it to the next level
you could always transform it into solid
aluminum as well if you adjust the
cutting arm of your styro-slicer’ to
roughly match the base of the gun you
can easily make a custom foam riser a
little glue to the handle this is the
setup I used for burying my pistol nose
down into a bucket of sand and to turn
it into solid metal all you have to do
is dump in a crucible full of hot liquid
aluminum the scorching molten metal
vaporizes the foam instantly and somehow
rushes in to fill all the spaces as it
does of course your styrofoam creation
gets completely destroyed in the process
but you’ll get a solid metal casting in
return by the way if you want to make
anything else at a foam your imagination
is the only limitation I designed and
built a whole squadron of 3d foam
fighter jets that are actually puzzles
you can take apart and put back together
so if you want to try making them next
look for these foam fighters in another
project video well now you know how to
use dollar-store foam board and your
homemade styro-slicer’
to make a realistic and
three-dimensional Saturday night special
well that’s it for now if you like this
project perhaps you’ll like some others
check them out at the king of random
comm hey guys at the end of this video
but it’s not the end of the adventure
click here to see the last project can
click here to see the next I’ve made
over 100 project videos for you to check
out and I’m still making new videos
every 5 days so click here to subscribe
to my youtube channel it’s free and if
you update your youtube notification
settings you can get an email every time
I upload in the meantime here are a few
other videos I recommend watching
they’re all favorites for different
reasons and you’ll learn something new
in every project thank you for watching
sharing and supporting my videos and
I’ll see you in the next project video
I’ll talk to you then
[Music]
how to make a cool 3d handgun out of
styrofoam that you can use for props
cosplay or even backyard metal casting
to get started we’ll first need to whip
out the hot wire styro-slicer’ we made
in a previous video and watch this
simply unbuckle the latch on the side
and you can have the whole thing set up
and ready to slice foam in under 10
seconds and like most of my other
styrofoam creations this pistol all
starts with dollar-store foam board
I like these sheets of foam because
they’re all about the same thickness and
once the paper layers are peeled off the
front in the back they’re really easy to
work with if you want to make the same
gun I used in my styrofoam – aluminum
video then you’ll just need to print off
two copies of this template I made in
Photoshop I base this template around a
design I found on YouTube for an m9
rubber band handgun by RB guns and I put
links in the description to where you
can find them for free go ahead and cut
out all the shapes and lay them on the
table and you should end up with 11
tracing templates which are basically
all just mirror images of each other
these pistol parts are designed to stack
together to form a really cool looking
3d prop but we need to carve the custom
parts out of the phone first so let’s
get to work making that happen next
smear the surface of the paper templates
with a glue stick and focus on getting
good coverage around the edges so you
can transfer the paper to the foam and
stick them firmly in place
alright the time has come to power up
the styro-slicer’ and the first thing I
like to do is chop the board into
smaller pieces to make the templates a
bit more manageable to work with from
here it’s pretty easy to glide around
the edges of the individual shapes and
trace them out with an impressively
professional finish it always amazes me
how the wire slices through the foam so
easily but not through the paper
templates themselves but that’s exactly
why this works now when you’re preparing
to cut around the trigger-guard it’s not
as difficult as it might seem the
styro-slicer’ actually has a cool little
feature that’ll make it quick and easy
for you just poke a decent-sized hole in
an area you don’t need then turn off the
power and give the wire a couple seconds
to cool down you can simply unhook the
spring from the eye bolt at the top
thread the wire through the hole in the
trigger guard and rehook the spring back
onto the eye bolt as easy as that you’ve
got the ability to make detailed inside
cuts and some of the hardest to reach
places alright we’ve got all the
components manufactured and we’re just
about ready to assemble the foam weapon
all that’s left to do is remove the
paper and glue it together slowly and
carefully peel the templates off the
foam the same way you did with the board
in the beginning
and if you’re careful enough you’ll be
able to reuse them again now to assemble
this foam firearm simply lay the pieces
out so you can better visualize how
they’re going to stack together and just
for planning purposes each half of your
handgun needs to look like this if
you’re ready to commit to this design
then go ahead and apply a generous
amount of glue to the backs of foam
components and carefully set the pieces
in place the slide assembly and the
pistol grip go on last and should line
up with some of the obvious features on
the base and the last little piece is
just for decoration so push it into the
little gap in the middle this completes
one half of the gun and we’ll need to
assemble the other side the same way but
make sure this other side is pointing
the opposite direction that’s important
with the two sides complete you should
have twin half pistols that are mirror
images of each other so if you do then
let’s make the two become one
smear a generous amount of glue on each
of the bottoms then slowly and carefully
line up the two halves and gently press
them together double-check the edges
match up on every side and give it a few
minutes for the glue to start setting
and with that your styrofoam sidearm is
pretty much done now to polish it up a
bit try using a 220 grit sanding sponge
to smooth out any imperfections the foam
is pretty soft so by lightly sanding it
you can get your gun to clean up really
nice with a hand gun sanded the very
last step is to add the small circle to
the tip completing the barrel and that’s
it you’ve just made yourself a really
cool looking 3d foam pistol that you can
use for props or cosplay of course if
you want to take it to the next level
you could always transform it into solid
aluminum as well if you adjust the
cutting arm of your styro-slicer’ to
roughly match the base of the gun you
can easily make a custom foam riser a
little glue to the handle this is the
setup I used for burying my pistol nose
down into a bucket of sand and to turn
it into solid metal all you have to do
is dump in a crucible full of hot liquid
aluminum the scorching molten metal
vaporizes the foam instantly and somehow
rushes in to fill all the spaces as it
does of course your styrofoam creation
gets completely destroyed in the process
but you’ll get a solid metal casting in
return by the way if you want to make
anything else at a foam your imagination
is the only limitation I designed and
built a whole squadron of 3d foam
fighter jets that are actually puzzles
you can take apart and put back together
so if you want to try making them next
look for these foam fighters in another
project video well now you know how to
use dollar-store foam board and your
homemade styro-slicer’
to make a realistic and
three-dimensional Saturday night special
well that’s it for now if you like this
project perhaps you’ll like some others
check them out at the king of random
comm hey guys at the end of this video
but it’s not the end of the adventure
click here to see the last project can
click here to see the next I’ve made
over 100 project videos for you to check
out and I’m still making new videos
every 5 days so click here to subscribe
to my youtube channel it’s free and if
you update your youtube notification
settings you can get an email every time
I upload in the meantime here are a few
other videos I recommend watching
they’re all favorites for different
reasons and you’ll learn something new
in every project thank you for watching
sharing and supporting my videos and
I’ll see you in the next project video
I’ll talk to you then
[Music]
Please follow and like us: