
hey guys welcome back on Nate thank you
for joining me today on the king of
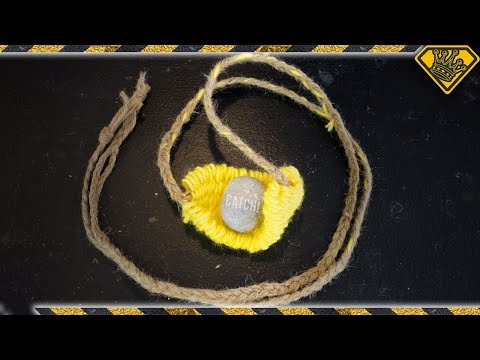
random a sling is a tool that is
thousands of years old used to hurl
projectiles at high speeds over long
distances it’s been used as a hunting
tool and a weapon of war it’s light
weight has incredible range and best of
all for us it’s very easy to make so the
purpose of today’s video is to show you
how to make your own sling at home in
just a few minutes using some low cost
materials here are all the supplies
we’ll need for this build yarn from any
craft or fabric store
some drinking straws I prefer the
thicker ones you can often find at fast
food restaurants and some twine this is
jute cord also available at most craft
and fabric stores and that’s all the
supplies you’ll need to start let’s grab
one of our straws and our yarn the first
step is to tie a simple overhand knot
with your yarn around one of the straws
you’ll want to be sure that you leave
six to eight inches of extra yarn after
your knot gather all six straws and hold
them in your hand with the yarn attached
to the far right straw to begin simply
weave the yarn through the straws with
each straw you need to alternate if the
yarn goes in front or behind the straw
when we get to the last straw wrap it
around and weave back keep weaving the
yarn up the straw being sure to pull it
tight and slide it all the way down
every couple of passes at first it might
be a little hard to hold on to the
straws as you weave but it will get
easier as the straws get wrapped up and
held in place by the yarn there
shouldn’t be any gaps in your yarn
always press it down so that the
different layers are touching each other
[Music]
we’ve now woven our yarn nice and
tightly together about six inches wide
so it’s cut off our excess yarn and set
this aside for a moment and prepare our
twine let’s measure out six pieces of
twine each piece should be ten feet long
with our lengths of twine cut let’s feed
one through each of the six straws
[Music]
before we remove the straws we want to
be sure that the yarn pocket is in the
center of the lengths of twine gather
together all six ends of the twine on
both sides being careful to keep the two
sides separate from each other hold them
in one hand and stretch the pocket and
straws away from them if the straws
aren’t centered on the twine pull on the
short side until the straws are right in
the middle with the straws and yarn
centered on the twine it’s time to
carefully remove the straws holding the
yarn so that the weave doesn’t unravel
gently pull the straws in one uniform
direction you may find that the center
straws slide out more easily than the
two straws on the edges to be sure you
didn’t accidentally pull any of the
twine while you are removing the straws
it’s best to line up the edges and make
sure the pocket is centered again if the
yarn pocket is too far to one side
carefully slide it along the twine to
Center it again now with our pocket
centered we want to tighten it up and
cinch it off secure all six strands on
one side of the twine and begin pushing
the yarn down into the middle once that
side seems fully compacted switch to the
other side and do the same thing the
yarn pocket should end up about half as
long as it was once the yarn is
compacted into the center you want to
grab the extra piece that you left and
gently pull it to cinch the edges before
tightening the side where the weave
began be sure to undo the overhand knot
you made around the straw the pocket is
formed so now let’s make the cords
divide the twine into three sets of two
strands
[Music]
to make the braiding process easier
we’ll secure the side we’re not working
on to the table with tape now we’re
ready to begin braiding to make a braid
take one of the outside lengths of cords
and place it in the middle of the other
to take the cord from the other side and
now move it into the middle repeat this
process over and over and the braid
forms every so often you’ll need to make
sure that the back of your twine is not
getting tangled be sure to keep the
braid nice and tight by pulling on it
there shouldn’t be any gaps or holes in
the braid you can choose how long to
make your cords I prefer a length of
just over two feet once you’ve reached
the length that you want simply tie an
overhand knot to end the braid remove
any excess twine with one side complete
we want to repeat the process on the
other side
when our second braid is about three
inches from the length of our first
we’re going to add an addition that
makes it easier to use we’re going to
make two smaller braids select one
strand from each of the three bundles we
want to braid each of these three
strands together keep going until your
small braid is approximately 2 inches
long then make a second identical braid
with the other 3 strands with the two
smaller braids completed let’s form our
double strands again and return to the
larger size braid we only need about
half an inch of our larger braid before
we tie this off and this side of the
cord will be complete this braided loop
gives us something that we can easily
hold on to and let go of to facilitate
the use of our sling your sling is now
complete there are a lot of things that
can be used for a mo most traditionally
small smooth rocks however we don’t want
to be doing any damage with these so
what we’re going to use is small
crumpled-up balls of foil this is a good
size to fit in our sling is lightweight
enough that it won’t damage anything but
it’s heavy enough that it should fly
through the air fairly well to use our
sling take your ammo put it in the
pocket of the slingshot and fold it in
you’ll then twirl the sling around your
head and release from the loop that we
made with the small braids let’s take
this outside and try it out I’ll spin
this above my head and let go of the
side that I’m holding in the loop my aim
is terrible I’m learning
well that launched pretty well into the
neighbor’s yard so hopefully they won’t
mind a small piece of foil on their
grass a little bit of wind this time
we’ll see if that affects anything
that’s pretty good had some good zing to
it flew kind of straight did not go over
the wall just backed into the brick
let’s go see what happened mostly I’m
just curious if it flattened part of the
foil I think it did it’s not very
obvious but I’m pretty sure this is
where I hit the wall
our whole shot is now a little bit
narrower from the impact let’s try a few
more times that went into the neighbor’s
yard again I need to find a better
target so instead I’m just going to
throw it down the street there’s really
nothing that can be broken and these
little balls of foil probably couldn’t
break anything anyway and now I’ll be
able to go get it it’s not going to go
over a fence into someone’s yard unless
I’m a very bad shot in which case it
will we’ll see Oh in someone’s yard but
not over a fence I’m gonna try spinning
it in a different direction so it’s more
down the street and less in circles
above my head oh there we go
that was straight right down the middle
of the road if I were David fighting
Goliath I’m pretty sure I’d lose he had
a lot more practice than me grounder for
me the helicopter and releasing sideways
I keep launching it off to left or right
what’s working better for me and you
should practice this on your own I go
around and then I come down and up and
that’s really getting a lot straighter
of a shot for me let’s try things out
with the projectile that won’t damage
anything figure out what works best for
you I’m gonna try using marshmallows
because they’re fun both taste like
really good projectiles and this will
work
still one sideways and that marshmallow
didn’t come down it lives in a tree now
some squirrel is gonna be so happy now
I’m gonna try and throw marshmallow into
the air while grant tries to catch it in
his mouth for science oh oh in and out
in and out yeah new chubby bunny
challenge chubby bunnies from a distance
long distance chubby bunny long distance
show many buddies I could see this
becoming a little sport perfect alright
yeah that was sweet it was like a wiffle
ball just move curve ball marshmallow
there you have it how to make your own
David and Goliath style sling using just
yarn twine and some straws like I said
all sorts of things can be used as ammo
when these were used as weapons of war
they would often use cast pieces of lead
and in fact some ancient Greek pieces
have been found with inscriptions on
them that say things like catch or take
that now reminder that if you’re using
any sort of metal or rocks these things
can be extremely dangerous
so be sure you’re nowhere near any
people or fragile objects I hope you’ve
enjoyed this project thank you so much
for joining us and we look forward to
the next one talk to you then and then I
just that when I just let go
early flew off backward random happens
they both go that way hey guys I hope
you’re feeling happy today I know I am
because you’re keeping this channel
alive and well we really appreciate your
support because we could not be doing
this without you that’s why you’re the
best
Please follow and like us: