
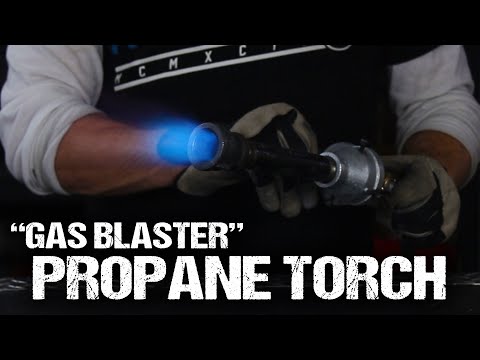
in this video I’m going to show you how
to build a fire-breathing gasps blaster
torch from simple and common materials
this homemade jet torch shoots a steady
and adjustable flame that gets hot
enough to melt metal which means now you
can dodge the challenges of charcoal by
powering your foundry on propane to
start this project simply stop in to see
any local propane supplier and pick up
an eight-foot length of propane hose
you’ll need a quarter inch hose with two
3/8 inch flare fittings crimped the ends
which they’ll probably make for you
right there at the shop and while you’re
at it see if they have a quarter inch
brass plug and a 3/8 inch flare by
quarter inch 45-degree fitting they can
slide it as well
the other parts are a quarter-inch ball
valve a quarter inch pipe nipple and a
quarter inch galvanized coupling all
available at your local hardware store
alright let’s get started wrapping each
of the third it ends with teflon tape so
they’ll make a better seal when we screw
them together in just a minute
this is pretty much the order of the
pieces are going together so let’s kick
off the assembly by attaching the flared
end of the brass 45 the end of the 8
foot hose screw the fittings together
finger tight then use a pair of pliers
to cinch them together so they make an
airtight seal add the ball valve neck
screwing it tightly together the same
way then screw the pipe nipple on to the
end it’s important that the valve handle
opens towards you and shuts off in the
down position so double-check you put it
on the right way then move on to making
the intake nozzle next now rather than
screwing the quarter-inch coupling to
the pipe nipple right now it’s going to
be really helpful to use a sanding belt
or a metal file to flatten down each of
the four sides first the flattened sides
will make it easier for four set screws
to bite into place later on and hold the
coupling securely in place alright let’s
move onto assembling the propane nozzle
and for that we’ll need the brass plug
from earlier a six millimeter tap and a
wire feed welding tip now you could save
money simply by drilling a point six
millimeter hole directly into the brass
plug itself but I’m using wire feed
contact tips because they’re replaceable
they look cool and the hole is exactly
the right size for this torch go ahead
and drill a 3/16 inch hole directly
through the center of the brass plug
it’s important to get the hole as
straight as you can so I’m using a drill
press I found at a garage sale for $20
but if you’ve got steady hands you can
make it work just fine with a cordless
drill as well the next step is to cut
inner threads in the hole so the welding
tip will screw into place and an m6 by
1.02 works great for tapping that
I added thread tape to the welding tip
just for good measure and with a few
flicks of fingers you can see we’ve got
a good-looking propane nozzle ready to
join the system go ahead and screw the
nozzle securely to the steel coupling
then just set it to the side for a
second because we’re actually going to
move over to working on the jet tube for
a bit the components we’ll need to
finish the torch are for socket cap
screws a one-inch steel reducer coupling
a 1 and 1/2 inch steel reducer coupling
and a 6 inch steel pipe now to secure
the jet assembly to the nozzle we first
have to drill holes for the set screws
so file down the four sides of the
larger coupling to make them nice and
flat then clamp it in a vise to hold it
securely because it’s important these
holes are drilled as straight as
possible
another cool trick is to screw the pipe
on and adjust it horizontally to help
ensure the coupling is about as
perpendicular as you can get it now the
position of the holes you drill is
really important
you need to eighth inch holes drilled
through the rim of the large end
opposite from each other then two more
eighth inch holes perpendicular to the
first two and right on the edge where
the adapter begins sloping down we need
to tap these holes as well but they’re a
slightly different size so let’s use an
m5 by 0.8 tap this time because that’s
the one that matches the threads on our
cap screws okay now that we’ve got the
intake port machined and completed the
hardest part is over and we can bring
back the nozzle we made earlier and
secure the two pieces together with set
screws twist the cap screws into the
holes and you should find they easily go
all the way in by hand and if you
drilled and tapped your holes correctly
the four tips of the screws will meet
together and form a cross at the center
let’s combine these two parts together
simply by setting the adapter overtop of
the nozzle and checking to make sure the
tip is centered inside the hole at the
top let’s secure it in position by hand
tightening the screws until we feel them
touch the coupling inside then simply
fine-tune the adjustments keeping the
nozzle as centered as possible now when
the screws are in finger tight we can
make the assembly a little stronger by
adding some tension with a screwdriver
the screws should only need about a
quarter twist each to lock the nozzle on
tight but feel free to go around a
second time if you want to be extra sure
at this point our modified intake
adapter has two set screws at the bottom
two perpendicular screws an inch above
those and a propane nozzle sitting
perfectly centered in the middle now
it’s a really good idea to have an
adjustable regulator to control the air
flowing through the torch so let’s make
one of those next all you need is an
empty can of tuna and this air regulator
template
me which you can have for free just look
in the description for a link on where
to get it
printing cut out one of the paper
templates then glue it directly to the
center of the steel lid the steel should
be thin enough to slice with a pair of
scissors so carefully cut around the
edges of the template then gently mold
it from the back into a bowl shape with
the center pressed in and the edges
raised up a bit it should look a bit
like a small steel shield this slit on
the side lets you slip the regulator
completely over the intake port
essentially blocking off any airflow
I’ll see why that’s important in a
minute from this point the rest of the
torch is really easy to assemble simply
drop to half inch cut washers over the
end of the pipe nipple then grab the
intake adapter and screw the inside
coupling on as tightly as you can get it
by hand now screw the small steel
adapter onto the 6-inch pipe until it’s
hand tight as well then loosely screw
those pieces onto the air intake adapter
just like that this gas plaster torch is
completely finished and ready to breathe
fire
now you can hook this up to your propane
tank and use it right away but for
safety and protection you really should
add a pressure gauge in some kind of
regulator valve you’ll also need a
quarter inch press to light valve for
connecting the regulator to the propane
tank and a quarter inch by 3/8 inch
flare fitting for connecting the
regulator to the hose now open the valve
on the tank and spin the regulator up to
about 30 psi so you can check for any
leaks in the hose and the connections if
you hear any hissing then double-check
the connections have thread tape on them
and tighten everything up until the
hissing stops at this point our propane
torch is a hundred percent finished so
why not take it for a test drive and see
what it can do now firing up the torch
really couldn’t be easier simply hold a
flame near the nozzle with one hand and
slowly open the valve on the torch with
the other it should light off no problem
and watch this if we slowly adjust the
air regulator at the back we can convert
it from a fire-belching blow torch to a
metal melting jet torch in just an
instant the sound and color of the flame
will tell you a lot about how the fuel
in the air are balanced so if you’re
planning to melt metal just play with
the flame until you get a nice blue
color and a jet loud roar blue flames
like this are slightly oxidizing and are
the color I use for my backyard casting
by regulating the air intake you have
the option of using any length of pipe
you want and can slide between an
oxidizing flame and a reducing flame as
quick as you need
when you’re ready to shut it off simply
close the valve on the handle and the
flame disappears in an instant perhaps
the best part about this jet torch
design is that it works with the flower
pot foundry I showed you how to make in
a previous project without any other
modifications required the end flare
doesn’t actually fit through the blower
port though but you can just take it off
amazingly the inside of the foundry acts
as an improvised nozzle all by itself so
just point the tube into the hole and
it’ll work just fine that’s really all
it takes to convert your backyard
foundry to propane add a little gas and
light it off with a BBQ igniter then
adjust the airflow until you see the
flame tighten into a fiery vortex of
metal melting power now this setup can
get really hot in a hurry so quickly put
on the lid and stand back in as little
as 5 minutes the inside of your foundry
will be glowing red-hot you’ll be
melting all your favorite metals without
any of the challenges you had with
charcoal there’s no babysitting no mess
to clean up afterward and what’s really
cool is you’ll probably be saving money
as well the gas blaster is designed to
self-regulate and sustain a healthy
flame from 1 psi all the way through 55
psi without even flinching that means
you can run your foundry as hot or as
cool as you want just by regulating the
pressure from the propane tank the
inside of the foundry gets hot enough to
boil brass and liquify bullet casings on
contact but amazingly the intake end of
the torch stays relatively cool the
entire time by the way if one jet torch
can do all that
why not exponential eyes the power by
adding another I added a tea fitting to
my hose so I could split it and run
separate lines to each torch then drill
the second hole through the side of my
foundry so now the flames hit the
crucible from either side try it for
yourself and you’ll be amazed at how
fast this flaming duo can really heat
things up well now you know how to use
easily accessible and easy to replace
parts to make a gasps blaster jet torch
and convert your backyard foundry to
propane well that’s it for now if you
liked this project perhaps you’ll like
some of my others check them out at the
king of random comm hey guys I hope you
learned something new or at least saw
something you like thank you so much for
watching and sharing my videos that is
exactly why you are the best now if
you’re in the mood to see another
project video just click here to go back
one or here to go forward you can also
see some my other favorite projects by
clicking on any of these if clicking the
screen isn’t working just look down in
the description I’ve put all the links
down there as well
including links to some my favorite
playlists thanks again for watching
sharing and supporting my videos and
I’ll see you in the next one talk to you
then
[Music]
to build a fire-breathing gasps blaster
torch from simple and common materials
this homemade jet torch shoots a steady
and adjustable flame that gets hot
enough to melt metal which means now you
can dodge the challenges of charcoal by
powering your foundry on propane to
start this project simply stop in to see
any local propane supplier and pick up
an eight-foot length of propane hose
you’ll need a quarter inch hose with two
3/8 inch flare fittings crimped the ends
which they’ll probably make for you
right there at the shop and while you’re
at it see if they have a quarter inch
brass plug and a 3/8 inch flare by
quarter inch 45-degree fitting they can
slide it as well
the other parts are a quarter-inch ball
valve a quarter inch pipe nipple and a
quarter inch galvanized coupling all
available at your local hardware store
alright let’s get started wrapping each
of the third it ends with teflon tape so
they’ll make a better seal when we screw
them together in just a minute
this is pretty much the order of the
pieces are going together so let’s kick
off the assembly by attaching the flared
end of the brass 45 the end of the 8
foot hose screw the fittings together
finger tight then use a pair of pliers
to cinch them together so they make an
airtight seal add the ball valve neck
screwing it tightly together the same
way then screw the pipe nipple on to the
end it’s important that the valve handle
opens towards you and shuts off in the
down position so double-check you put it
on the right way then move on to making
the intake nozzle next now rather than
screwing the quarter-inch coupling to
the pipe nipple right now it’s going to
be really helpful to use a sanding belt
or a metal file to flatten down each of
the four sides first the flattened sides
will make it easier for four set screws
to bite into place later on and hold the
coupling securely in place alright let’s
move onto assembling the propane nozzle
and for that we’ll need the brass plug
from earlier a six millimeter tap and a
wire feed welding tip now you could save
money simply by drilling a point six
millimeter hole directly into the brass
plug itself but I’m using wire feed
contact tips because they’re replaceable
they look cool and the hole is exactly
the right size for this torch go ahead
and drill a 3/16 inch hole directly
through the center of the brass plug
it’s important to get the hole as
straight as you can so I’m using a drill
press I found at a garage sale for $20
but if you’ve got steady hands you can
make it work just fine with a cordless
drill as well the next step is to cut
inner threads in the hole so the welding
tip will screw into place and an m6 by
1.02 works great for tapping that
I added thread tape to the welding tip
just for good measure and with a few
flicks of fingers you can see we’ve got
a good-looking propane nozzle ready to
join the system go ahead and screw the
nozzle securely to the steel coupling
then just set it to the side for a
second because we’re actually going to
move over to working on the jet tube for
a bit the components we’ll need to
finish the torch are for socket cap
screws a one-inch steel reducer coupling
a 1 and 1/2 inch steel reducer coupling
and a 6 inch steel pipe now to secure
the jet assembly to the nozzle we first
have to drill holes for the set screws
so file down the four sides of the
larger coupling to make them nice and
flat then clamp it in a vise to hold it
securely because it’s important these
holes are drilled as straight as
possible
another cool trick is to screw the pipe
on and adjust it horizontally to help
ensure the coupling is about as
perpendicular as you can get it now the
position of the holes you drill is
really important
you need to eighth inch holes drilled
through the rim of the large end
opposite from each other then two more
eighth inch holes perpendicular to the
first two and right on the edge where
the adapter begins sloping down we need
to tap these holes as well but they’re a
slightly different size so let’s use an
m5 by 0.8 tap this time because that’s
the one that matches the threads on our
cap screws okay now that we’ve got the
intake port machined and completed the
hardest part is over and we can bring
back the nozzle we made earlier and
secure the two pieces together with set
screws twist the cap screws into the
holes and you should find they easily go
all the way in by hand and if you
drilled and tapped your holes correctly
the four tips of the screws will meet
together and form a cross at the center
let’s combine these two parts together
simply by setting the adapter overtop of
the nozzle and checking to make sure the
tip is centered inside the hole at the
top let’s secure it in position by hand
tightening the screws until we feel them
touch the coupling inside then simply
fine-tune the adjustments keeping the
nozzle as centered as possible now when
the screws are in finger tight we can
make the assembly a little stronger by
adding some tension with a screwdriver
the screws should only need about a
quarter twist each to lock the nozzle on
tight but feel free to go around a
second time if you want to be extra sure
at this point our modified intake
adapter has two set screws at the bottom
two perpendicular screws an inch above
those and a propane nozzle sitting
perfectly centered in the middle now
it’s a really good idea to have an
adjustable regulator to control the air
flowing through the torch so let’s make
one of those next all you need is an
empty can of tuna and this air regulator
template
me which you can have for free just look
in the description for a link on where
to get it
printing cut out one of the paper
templates then glue it directly to the
center of the steel lid the steel should
be thin enough to slice with a pair of
scissors so carefully cut around the
edges of the template then gently mold
it from the back into a bowl shape with
the center pressed in and the edges
raised up a bit it should look a bit
like a small steel shield this slit on
the side lets you slip the regulator
completely over the intake port
essentially blocking off any airflow
I’ll see why that’s important in a
minute from this point the rest of the
torch is really easy to assemble simply
drop to half inch cut washers over the
end of the pipe nipple then grab the
intake adapter and screw the inside
coupling on as tightly as you can get it
by hand now screw the small steel
adapter onto the 6-inch pipe until it’s
hand tight as well then loosely screw
those pieces onto the air intake adapter
just like that this gas plaster torch is
completely finished and ready to breathe
fire
now you can hook this up to your propane
tank and use it right away but for
safety and protection you really should
add a pressure gauge in some kind of
regulator valve you’ll also need a
quarter inch press to light valve for
connecting the regulator to the propane
tank and a quarter inch by 3/8 inch
flare fitting for connecting the
regulator to the hose now open the valve
on the tank and spin the regulator up to
about 30 psi so you can check for any
leaks in the hose and the connections if
you hear any hissing then double-check
the connections have thread tape on them
and tighten everything up until the
hissing stops at this point our propane
torch is a hundred percent finished so
why not take it for a test drive and see
what it can do now firing up the torch
really couldn’t be easier simply hold a
flame near the nozzle with one hand and
slowly open the valve on the torch with
the other it should light off no problem
and watch this if we slowly adjust the
air regulator at the back we can convert
it from a fire-belching blow torch to a
metal melting jet torch in just an
instant the sound and color of the flame
will tell you a lot about how the fuel
in the air are balanced so if you’re
planning to melt metal just play with
the flame until you get a nice blue
color and a jet loud roar blue flames
like this are slightly oxidizing and are
the color I use for my backyard casting
by regulating the air intake you have
the option of using any length of pipe
you want and can slide between an
oxidizing flame and a reducing flame as
quick as you need
when you’re ready to shut it off simply
close the valve on the handle and the
flame disappears in an instant perhaps
the best part about this jet torch
design is that it works with the flower
pot foundry I showed you how to make in
a previous project without any other
modifications required the end flare
doesn’t actually fit through the blower
port though but you can just take it off
amazingly the inside of the foundry acts
as an improvised nozzle all by itself so
just point the tube into the hole and
it’ll work just fine that’s really all
it takes to convert your backyard
foundry to propane add a little gas and
light it off with a BBQ igniter then
adjust the airflow until you see the
flame tighten into a fiery vortex of
metal melting power now this setup can
get really hot in a hurry so quickly put
on the lid and stand back in as little
as 5 minutes the inside of your foundry
will be glowing red-hot you’ll be
melting all your favorite metals without
any of the challenges you had with
charcoal there’s no babysitting no mess
to clean up afterward and what’s really
cool is you’ll probably be saving money
as well the gas blaster is designed to
self-regulate and sustain a healthy
flame from 1 psi all the way through 55
psi without even flinching that means
you can run your foundry as hot or as
cool as you want just by regulating the
pressure from the propane tank the
inside of the foundry gets hot enough to
boil brass and liquify bullet casings on
contact but amazingly the intake end of
the torch stays relatively cool the
entire time by the way if one jet torch
can do all that
why not exponential eyes the power by
adding another I added a tea fitting to
my hose so I could split it and run
separate lines to each torch then drill
the second hole through the side of my
foundry so now the flames hit the
crucible from either side try it for
yourself and you’ll be amazed at how
fast this flaming duo can really heat
things up well now you know how to use
easily accessible and easy to replace
parts to make a gasps blaster jet torch
and convert your backyard foundry to
propane well that’s it for now if you
liked this project perhaps you’ll like
some of my others check them out at the
king of random comm hey guys I hope you
learned something new or at least saw
something you like thank you so much for
watching and sharing my videos that is
exactly why you are the best now if
you’re in the mood to see another
project video just click here to go back
one or here to go forward you can also
see some my other favorite projects by
clicking on any of these if clicking the
screen isn’t working just look down in
the description I’ve put all the links
down there as well
including links to some my favorite
playlists thanks again for watching
sharing and supporting my videos and
I’ll see you in the next one talk to you
then
[Music]
Please follow and like us: